.png)


A Guide to Site Architecture for SEO in Webflow
Solid site architecture for SEO is the blueprint for your website's success. It’s not just a nice-to-have; it's a non-negotiable foundation that dictates how search engines find, understand, and ultimately rank your content.
Honestly, this is the critical first step you need to take before you even think about opening the Webflow Designer. Get this right, and you've built your most valuable SEO asset from day one.
Your SEO Success Starts with Site Architecture
I like to think of a website's structure like a library. When a library is well-organized, the librarian (let's call her Google) can instantly find any book because everything is sorted into logical categories on clearly labeled shelves. A messy library? It’s a nightmare to navigate. Your site architecture does the exact same thing for your content.
This strategic planning directly influences the SEO metrics that actually matter:
- Crawlability: A clean structure is like a clear map for search engine bots. It helps them discover all your pages efficiently, making sure no important content gets lost in the digital clutter.
- User Experience (UX): When people can find what they're looking for without getting frustrated, they stick around longer. Those positive engagement signals are gold for Google.
- Link Authority: A smart architecture strategically funnels the "link juice" from powerful pages (like your homepage) down to deeper, important pages, giving them a much-needed ranking boost.
- Topical Authority: Grouping related content into clusters signals to Google that you're an expert on a topic. This is how you start ranking for a whole universe of relevant keywords, not just one or two.
The Power of a Shallow Hierarchy
Keeping your site structure shallow is one of the most effective things you can do for your SEO. This means your most important pages should only be a few clicks away from the homepage. It’s a powerful signal to search engines about what you consider most valuable, which drastically improves the chances of those pages being crawled and indexed properly.
Here’s a great visual of how a logical, hierarchical structure should flow, from the homepage down to more specific subpages.

As the diagram shows, a flatter architecture ensures your key content is never too far from the starting point, which is a win-win for both crawlers and actual human visitors.
The biggest mistake I see is letting a site grow "organically" without any real plan. This always results in a deep, tangled mess where valuable pages get buried six, seven, or even eight clicks deep—making them practically invisible to search engines and a dead end for users.
If you want to make sure your site architecture is perfectly dialed in from the start, it can be incredibly valuable to get an expert opinion. Finding the best SEO consultant for SaaS companies, for example, can give you the strategic foresight needed to build a rock-solid foundation.
Investing in a solid blueprint from the get-go saves you from massive SEO headaches down the road and ensures your Webflow site is built for performance and visibility from the moment you launch.
How to Design Your URL and Folder Structure in Webflow
Alright, you've got your site architecture blueprint. Now it's time to get our hands dirty and build this thing out in Webflow. A clean, logical URL is one of the most underrated pieces of the site architecture for SEO puzzle. Think of it as a clear signpost for both people and search engines—it gives them instant context for what a page is all about.
Getting this right from the very beginning saves you from massive headaches down the road. A solid URL and folder system is built to scale, reinforces your content hierarchy, and just makes your entire site easier to get around.
Setting Up Logical Folders in Webflow
Think of your website's folders as the main dividers in a digital filing cabinet. In Webflow, you'll use these to group related static pages together.
Here’s a quick tutorial on creating a folder for your "About" pages:
- From the Pages Panel (P) on the left, click the "Create New Folder" icon.
- Name the folder
About. Webflow will automatically create the URL structure/about. - Now, you can create new static pages (like "Our Story" or "Our Team") and simply drag and drop them inside this
Aboutfolder in the Pages Panel.
The resulting URLs will be perfectly structured:
/about/our-story/about/our-team/about/careers
This simple setup immediately signals to Google that these pages are thematically connected. It’s a small detail that strengthens your topical relevance and creates a much cleaner navigation path for everyone.
Using CMS Collections for Scalable Content
When it comes to dynamic content—think blog posts, services, case studies, you name it—Webflow's CMS Collections are your absolute best friend. They let you create a standardized URL structure that gets applied to every single new item you add, which is a lifesaver for consistency.
When you create a new Collection, you'll define a Collection URL, which acts as the parent folder. You might set up a "Blog Posts" collection with /blog as its parent folder. From that point on, every new article you publish will automatically live under that directory, like /blog/my-awesome-post.
This is where you lock in the structure that generates those clean, keyword-rich slugs for all your dynamic content.
The screenshot here shows exactly where this happens in Webflow. You can tell the CMS to pull from a specific field, like the "Name" or "Title," to auto-generate the URL slug for each item. This little trick ensures every URL is descriptive and consistent without you having to think about it.
Real-World URL Structure Examples
Let's look at a quick comparison. The difference between a messy URL structure and a clean, SEO-friendly one is night and day.
Confusing Structure:
yourdomain.com/page-id-8675309yourdomain.com/services_we_offeryourdomain.com/q1-blog-update-final
Clean and Effective Structure:
yourdomain.com/services/web-designyourdomain.com/services/seo-strategyyourdomain.com/blog/how-to-improve-site-speed
The goal is to make your URLs "hackable." A user should be able to logically guess the URL of a related page. If they're on
/services/web-design, it's reasonable for them to guess that/services/seo-strategymight also exist. That's the hallmark of an intuitive site architecture.
This clarity doesn't just help users; it helps search engine crawlers map out the relationships between your pages far more effectively. A simple, descriptive slug that includes a target keyword is a small but worthwhile ranking signal. To really nail these URL and folder strategies, diving into Webflow SEO best practices can give you an even more detailed playbook.
At the end of the day, designing your URL structure is all about building a system that's future-proof. By using logical folders for your static pages and well-configured CMS Collections for the dynamic stuff, you're giving search engines clear contextual clues about every page on your site—building a foundation that will support your SEO efforts for years to come.
Weaving Your Site Together with Content Silos and Internal Links
With your URL structure dialed in, it's time to build the pathways that connect everything. This is where internal linking comes in, and it's far more than just adding a few links to your homepage. Think of internal links as the threads that weave your individual pages into a cohesive tapestry, signaling to both users and search engines what your site is truly about.
This strategic approach is called siloing. In essence, you’re grouping related content together to build deep pockets of expertise on your site. When you do this right, you're not just publishing articles; you're creating a definitive resource and telling Google, "When it comes to this topic, we're the authority."
The Pillar and Cluster Model: Your Blueprint for Authority
The most effective framework I've seen for building powerful content silos is the pillar and cluster model. It's a beautifully simple concept that works wonders for SEO.
- The Pillar Page: This is your cornerstone content. It's a comprehensive, high-level guide covering a major topic and targeting a broad, competitive keyword (like "Webflow SEO," for example). It's the central hub.
- The Cluster Content: These are the spokes. They're more focused, in-depth articles that dive into specific subtopics related to your pillar. Each of these cluster articles links back up to the main pillar page, and the pillar links down to them. For instance, cluster posts could be "optimizing images in Webflow" or "how to set up 301 redirects in Webflow."
This creates an incredibly strong, self-reinforcing loop. The pillar gains authority from all the internal links pointing to it from the cluster pages, and the cluster pages get a boost from the authoritative pillar. It’s a win-win that builds massive topical depth.
Practical Internal Linking in Webflow
The great thing about Webflow is that it has built-in features that make creating these silos a breeze, often with automation. Here’s how you can put this strategy into action.
Automatically Link Related Posts with Collection Lists
One of the quickest and most effective wins is adding a "Related Posts" or "Continue Reading" section to your blog post template. Using Webflow’s native Collection Lists, you can dynamically surface other articles from the same category.
Here’s the step-by-step tutorial for your Webflow CMS Template Page:
- On your main blog post template, add a new Collection List element where you want the related posts to appear.
- In the settings panel, source this list from your "Blog Posts" collection.
- Add a Filter:
Category>Is>Category from current Blog Post. This ensures only posts from the same category are shown. - Add a second Filter:
Blog Post>Is Not>Current Blog Post. This prevents the current article from showing up in its own related posts list. - Set a Limit on the list (e.g., to 3 items) to keep the layout clean.
- Design the inside of the Collection Item by dragging in elements like an Image, a Text Block, and a Link Block. Bind these elements to the corresponding CMS fields (Thumbnail Image, Name, and Current Post URL).
This one-time setup automatically creates a web of relevant internal links across all your articles, fortifying your content clusters without you lifting a finger for new posts.
Place High-Value Contextual Links in Rich Text
Automated links are fantastic for scale, but the most powerful links are the ones you place manually within your content. These are contextual links, and their power comes from the anchor text—the actual clickable words—that gives search engines a ton of context about the destination page.
When you're writing in a Webflow Rich Text field, simply highlight a phrase like "improving site architecture" and link it directly to another relevant article you've written. It takes a few extra seconds per post, but this is one of the most impactful SEO activities you can perform.
A classic mistake I see is people only linking to their homepage or top-level service pages. Go deeper. If you mention a specific tactic you've already covered in detail, link directly to that blog post. This distributes authority throughout your entire site, not just at the top.
The diagram below shows how a URL's structure—domain, folder, and slug—creates a logical hierarchy.
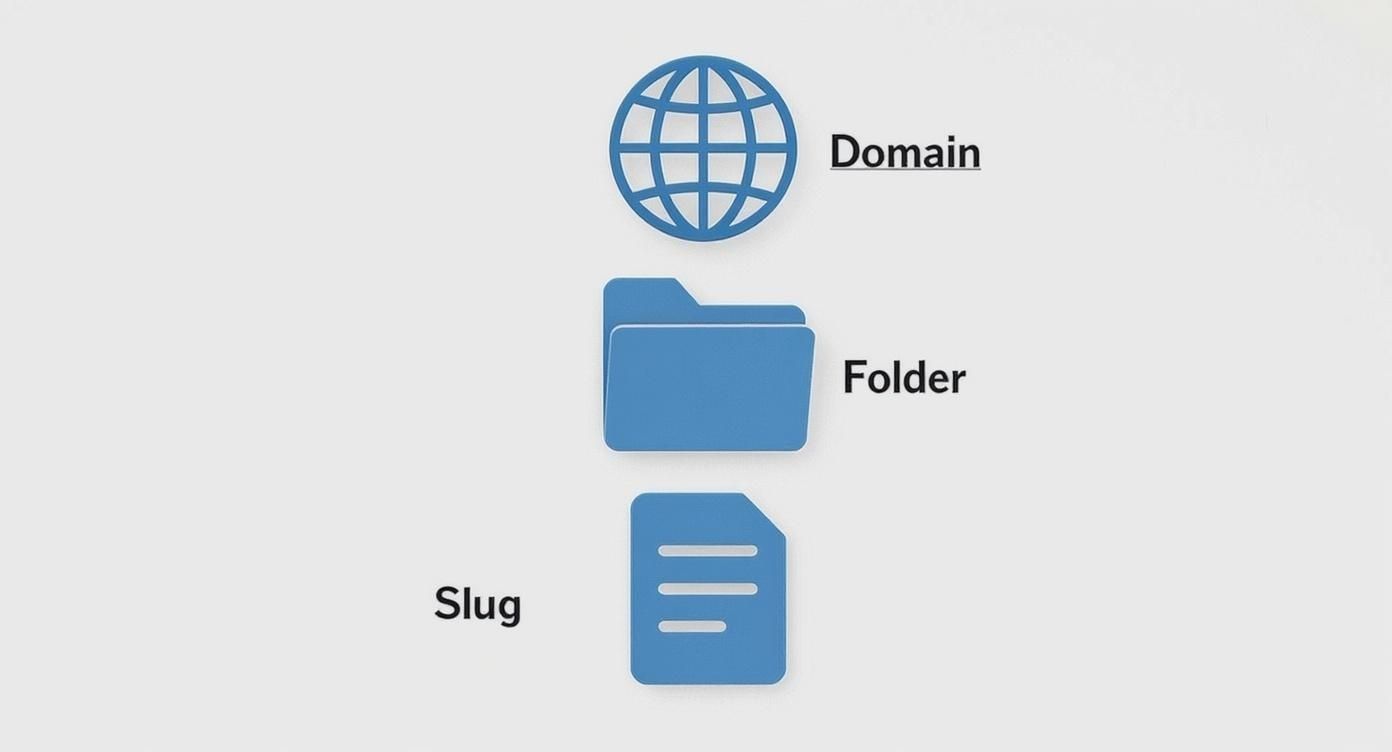
Your internal linking strategy reinforces this structure. By linking between pages within the same folder or "silo," you're strengthening those topical connections in Google's eyes.
Find and Rescue Your Orphan Pages
An orphan page is exactly what it sounds like: a page with no internal links pointing to it. It’s floating alone, disconnected from the rest of your site. For SEO, this is a dead end. Googlebot struggles to find these pages, and without any internal links passing authority to them, they have virtually zero chance of ranking for anything meaningful.
Tools like Screaming Frog or the site audit feature in Semrush are perfect for this. Run a crawl of your site, and they'll spit out a list of any pages with zero "inlinks." Once you've identified them, the fix is simple: find other relevant pages on your site and add a few contextual links pointing to your newfound orphan. Welcome it back into the family.
Making Sure Technical SEO Doesn't Sabotage Your Site Architecture
You can map out the most brilliant site architecture in the world, but if technical gremlins are lurking behind the scenes, all that hard work can go to waste. This is where we need to roll up our sleeves and get into the nitty-gritty—the technical details that make sure search engines can actually understand and appreciate your structure.
Think of it like building a house. Your architecture is the blueprint for all the rooms and hallways. Technical SEO is the solid foundation, the clear pathways, and the functional plumbing that makes the whole thing livable.
These technical elements aren't just for bots; they have a massive impact on real people. Page speed, how your site looks on a phone, and clean code are all part of a site's architecture, and they all influence your SEO. Google has been very clear that page speed is a ranking factor, which makes sense when you learn that 53% of mobile users will ditch a site if it takes more than three seconds to load. You can find more eye-opening SEO statistics like that to get the full picture.
A technically sound website is simply easier for Google to crawl, index, and understand. And just as importantly, it keeps your visitors happy.
Your XML Sitemap: The Official Map for Search Engines
The XML sitemap is your direct line to search engines. It’s essentially a map you hand over, showing them every important page on your site. The good news? Webflow handles most of the heavy lifting here by automatically generating and updating this file for you.
Here’s your actionable Webflow sitemap checklist:
- Enable auto-generation: Go to
Project Settings>SEOtab. Ensure the "Auto-generate sitemap" toggle is ON. - Exclude non-essential pages: In the field below the toggle, add the slugs of pages you don't want indexed (e.g.,
/thank-you,/draft-page). This keeps your sitemap clean and focused on valuable content. - Submit to Google: Copy your sitemap URL (
yourdomain.com/sitemap.xml) and go to your Google Search Console account. Under the "Sitemaps" section, paste the URL and click "Submit."
Don’t just set it and forget it. I’ve seen this mistake cost people rankings. Every few months, take a peek at your sitemap to make sure it's accurate. Check that it doesn't include old pages you've redirected or unpublished. A clean sitemap means a more efficient crawl.
Dealing with Duplicate Content Using Canonical Tags
Duplicate content can quietly kill your SEO efforts. It happens all the time, especially on sites with a CMS where one article might be accessible through multiple URLs—like from a category page, a tag page, and the main blog feed. This is where canonical tags save the day.
A canonical tag is a simple piece of code that tells search engines, "Hey, of all these identical pages, this is the one you should pay attention to." It points all the SEO value to a single, "master" version of the page.
Here's how to add a global canonical tag for your Webflow CMS collection pages:
- Go to your
CMS Collection Templatepage. - Open the Page Settings (the gear icon).
- Scroll down to the Custom Code section.
- In the
Inside <head> tagbox, paste the following code:<link rel="canonical" href="https://www.yourdomain.com{{wf {"path":"slug","type":"PlainText"\} }}" /> - Important: Replace
https://www.yourdomain.comwith your site's full base URL, including the collection folder (e.g.,https://www.yoursite.com/blog).
This one piece of code dynamically inserts the correct canonical URL on every single post, preventing duplicate content issues at scale.
Webflow-Specific Tips for Nailing Core Web Vitals
Google’s Core Web Vitals (CWVs) are all about user experience—how fast your page loads, how quickly it becomes interactive, and whether things jump around on the screen. A great site architecture for SEO is useless if the pages are too slow for anyone to stick around.
Here are a few practical things you can do right inside Webflow to boost your CWV scores:
- Get Smart with Images: Webflow is great because it automatically compresses images and serves them in the modern WebP format. But you still have to do your part. Never upload a giant 4000px image for a space that's only 500px wide. Resize your images before you upload them.
- Use Lazy Loading: For any images that aren't visible right when the page loads (anything "below the fold"), just switch on Webflow's native lazy loading. In the Designer, select an image, go to the Element Settings Panel (D), and under the Image Settings, choose
Lazy — loads when visible. - Audit Your Custom Code: Be ruthless with third-party scripts. Every tracking pixel and fancy widget adds weight to your page. If a script isn't absolutely essential for that initial page view, make sure you use the
deferorasyncattributes so it doesn't block your content from rendering.
To help you keep track of these technical elements, here's a quick checklist tailored specifically for your Webflow projects.
Technical SEO Checklist for Webflow Site Architecture
This table is a quick reference to make sure your Webflow site's technical settings are properly configured to support your architecture.
By staying on top of your sitemap, using canonicals, and keeping your site fast, you're making sure your carefully planned architecture isn't just a blueprint on paper—it's a high-performing structure that gives you a real advantage in the search results.
How to Audit and Fix Common Architecture Mistakes
Let’s be honest: no site architecture is perfect right out of the gate. Even the most meticulously planned structures can get a little messy over time as you add, remove, and update content. Auditing your site isn't about pointing fingers at what's broken; it's about finding opportunities to make your architecture a serious SEO powerhouse.
Think of this as your playbook for diagnosing and fixing the architectural hiccups that are quietly holding back your Webflow site. With the right approach and a few key tools, you can uncover those hidden problems and get your structure working for you.
Using Crawlers to X-Ray Your Site Structure
To really see your site the way Google does, you need a web crawler. Tools like Screaming Frog (a fantastic desktop app) or the cloud-based Semrush Site Audit are non-negotiable for this job. They essentially act like an army of bots, crawling every single page and bringing back a goldmine of data.
When you run a crawl, don't just glance at the top-line score. You're hunting for patterns that reveal weaknesses in your site's foundation.
- Broken Internal Links: These are dead ends for both users and search engine crawlers. They stop the flow of link equity cold. A quick crawl will spit out a list of every 404 error and tell you exactly which page has the broken link so you can get in there and fix it.
- Redirect Chains: Ever seen a page that redirects to another page, which then redirects to a third? That’s a redirect chain. You're forcing crawlers and users to take unnecessary hops, which can slow things down and water down link authority. The goal is always a single, direct redirect from the old URL to the new one.
- Deep-Level Pages: One of the most critical metrics I always check is crawl depth. This number tells you how many clicks it takes to get from your homepage to any other page. If you discover that your key service or product pages are buried five, six, or even seven clicks deep, they might as well be invisible.
An SEO tool's dashboard can give you a bird's-eye view of these architectural health metrics.

This kind of visual report helps you spot the big stuff—like a sudden spike in broken links or redirect issues—so you know exactly what to tackle first.
Visualizing and Untangling Your Hierarchy
Modern crawlers do more than just generate spreadsheets. They can create powerful visualizations of your site structure, showing you exactly how pages are connected and how "link juice" flows through your domain. A healthy structure should look like a clean, logical pyramid.
If your visualization looks more like a tangled spiderweb, that’s a huge red flag. It’s a classic sign of a confusing hierarchy where pages are linked together randomly, making it tough for Google to understand what your site is an authority on. The fix almost always involves going back to your internal linking strategy and reinforcing your content silos.
Masterfully Handling Redirects in Webflow
As you audit and improve your site, you’re definitely going to need to change some URLs. Maybe you're restructuring a folder or tweaking a blog post slug to be more keyword-focused. Whenever you do this, implementing a 301 redirect is non-negotiable.
A 301 redirect is a permanent instruction that tells browsers and search engines, "Hey, this page has moved for good. Send all of its SEO power to this new URL." Forgetting this is like throwing away all the hard work that went into ranking the original page.
Thankfully, Webflow makes managing redirects incredibly simple. Here's exactly how to do it:
- Head into your Project Settings.
- Click on the Hosting tab.
- Scroll down until you find the 301 Redirects section.
- In the "Old Path" field, type the old URL slug (e.g.,
/old-blog-post). - In the "Redirect to Path" field, enter the new URL slug (e.g.,
/new-and-improved-post). - Click Add Redirect Path and publish your site.
It's a straightforward process, but it's one of the most critical maintenance tasks for a healthy site. Poor redirect management is a common and costly mistake. A solid technical SEO foundation relies on clean architecture, and it's shocking to see that on some sites, up to 50% of redirecting URLs can lead to errors, hurting both search visibility and user experience. You can discover more insights about site architecture best practices to stay ahead of the curve.
By regularly auditing your site with a crawler, analyzing your structure, and diligently managing your redirects, you can transform your architecture from a potential liability into a powerful, compounding SEO asset.
Got Questions? I've Got Answers.
When you get down to the nitty-gritty of building a site architecture in Webflow, a lot of specific questions pop up. I see them all the time. Here are some of the most common ones I hear from clients and colleagues, along with practical, no-fluff answers.
Do I Really Need to Use Folders for Static Pages in Webflow?
It’s a great practice, but not always a day-one necessity. The real decider here is your site's scale and complexity.
If you’re running a small site—maybe 15-20 pages total—a flat structure (no folders) is probably fine. You won't confuse anyone. But the moment you start building out distinct content hubs for things like services, case studies, or resources, folders become your best friend for keeping things organized.
Think about it: grouping pages like /about/team and /about/mission makes it crystal clear to search engines that these pages are all part of the same thematic story. This is how you start building topical authority. It’s a small move that pays off big as you grow.
My rule of thumb is pretty simple: if you have three or more pages that fit under one conceptual umbrella, they belong in a folder. This keeps your structure clean and makes your site instantly understandable for both people and search engine crawlers.
How Deep Should My Site Architecture Go?
Keep it shallow. Seriously. The golden rule is to make sure any important page on your site is reachable within three or four clicks from the homepage.
If you bury pages deeper than that, you're creating problems. First, users get frustrated and leave. Second, you risk those pages being overlooked by search engine crawlers, which means they might not get indexed at all.
This "three-click rule" isn't just arbitrary; it's about making sure the powerful link equity from your homepage flows smoothly down to your key product or service pages. A deep, convoluted structure just thins out that authority and hurts your SEO performance.
What’s the Real Difference Between Categories and Tags in Webflow's CMS?
This is a huge point of confusion, but getting it right is crucial for a tidy, effective architecture. The best analogy I’ve found is a library.
- Categories are your main aisles. They represent the broad, foundational topics of your content and are the backbone of your content silos. A blog post should really only belong to one primary category, like "Web Design" or "SEO." In Webflow, this is best set up as a single-reference field to another "Categories" collection.
- Tags are the keywords in the index at the back of a book. They describe more specific, granular details within the content and can easily cross different categories. A single post might have several tags, like "Responsive Design," "Figma," or "Core Web Vitals." In Webflow, this is a multi-reference field to a "Tags" collection.
Using categories correctly builds strong, thematic silos. Tags, on the other hand, offer users a way to explore related ideas across those silos. Just be careful not to go crazy with them—creating hundreds of tags can spawn a mess of thin, low-value archive pages. Curate your tag list and keep it focused.
Are Breadcrumbs a Must-Have on My Webflow Site?
For any site with a clear hierarchy, breadcrumbs are a fantastic tool for both usability and SEO. They act as a secondary navigation system, showing users exactly where they are and giving them an easy path back to higher-level pages.
For search engines, breadcrumbs are another strong clue about your site's structure, reinforcing the parent-child relationships between your pages. While they aren't strictly mandatory for every single site, I highly recommend them for:
- E-commerce stores with multiple product categories and subcategories.
- Large blogs with a well-defined category structure.
- Resource centers or knowledge bases with many layers of content.
You can implement breadcrumbs pretty easily in Webflow using its dynamic linking features, creating a clear navigational trail that helps everyone. For a blog post, your breadcrumb trail might look like: Home > Blog > [Category Name] > [Post Title]. You can build this in your CMS Template page by linking text elements to the Homepage, your main blog page, the post's dynamic category page, and finally, a non-linked text element for the current page's title.
At Block Studio LLC, we do more than just build websites; we engineer revenue-generating machines by putting SEO-first site architecture at the core of everything we do. If you want to stop guessing and start seeing real, compounding growth from a unified design, development, and SEO strategy, we should talk. Explore how we can drive compounding growth for your business.
Article created using Outrank