.png)


How to Write Meta Descriptions for Webflow That Get Clicks
Think of your meta description as a 155-character sales pitch. It’s your one shot to tell someone scrolling through Google exactly what they’ll get by clicking on your page. Forget keyword stuffing; this is all about driving clicks by showing real value.
While it’s not a direct ranking factor, a killer description is basically your ad copy in the search results, and it has a massive impact on your click-through rate.
Why Meta Descriptions Still Matter for SEO
Let's get one thing straight: Google doesn't use the text in your meta description to rank your page. They've been very clear about that. But to say they don't matter for SEO is a huge mistake. Their impact is indirect but incredibly powerful.
Your meta description is your moment to earn the click. On a crowded search results page, your title tag might catch their eye, but it's the description that convinces them to choose you over the competition. It’s your chance to prove your page has the answer they're looking for.
The Psychology of the Click
For SaaS and B2B companies using Webflow, this is non-negotiable. Your potential customers are actively searching for solutions to their problems. A sharp, well-written description does three things really well:
- Sets Clear Expectations: Instantly communicates the problem you solve or the benefit you deliver.
- Builds Credibility: A confident, active voice positions you as the expert in the space.
- Sparks Action: A subtle call-to-action can be the nudge someone needs to click.
When you nail the description, you improve the user's experience before they even land on your site. That directly boosts your click-through rate (CTR). And a consistently higher CTR sends a strong signal to Google that people find your page relevant, which can absolutely influence your rankings over time.
This is what we're aiming for—turning good on-page SEO into real performance gains.
Think of strong metadata like this: it's one of the key inputs that pushes your overall SEO performance from average to excellent.
Working With Google, Not Against It
So, you've spent an hour crafting the perfect meta description for your Webflow page. Then you check the SERPs, and Google is showing something completely different. It happens. A lot. In fact, Google rewrites an estimated 60-70% of meta descriptions to better match a user's specific search.
Don't get discouraged. This isn't a sign of failure.
Your job is to write a great "default" description—a solid, all-purpose summary of the page's value. Then, make sure the content on the page itself is well-structured with clear headings and short, scannable paragraphs. This gives Google plenty of high-quality snippets to pull from for more specific, long-tail searches.
When you combine that with a smart internal linking strategy, as we cover in our guide on site architecture for SEO, you're essentially giving Google everything it needs to present your page in the best possible light, no matter what someone searches for.
A Practical Framework for High-CTR Meta Descriptions
Let's be honest, most advice on meta descriptions is pretty generic. To write snippets that actually get clicks for your Webflow site, you need a repeatable process. I've found it helps to think of a great meta description as having four essential ingredients.
When you get these four pieces right, you stop writing simple page summaries and start crafting compelling mini-ads that grab your B2B and SaaS audience's attention in the search results.
Start With User Intent
Before you even think about writing, you have to get inside the searcher's head. What are they really trying to accomplish? Are they just gathering information, actively comparing tools, or are they ready to pull out the company card?
A quick look at the top-ranking pages for your target keyword is the best way to figure this out. If you see a lot of "how-to" articles and "best of" lists, the intent is informational.
For instance, someone searching for "project management software for small teams" is likely in comparison mode. A hard-sell "Buy Now!" message will fall flat. Instead, your description should talk about features, benefits, and how easy it is to get started.
My Two Cents: Your meta description isn't a place to talk about yourself. It's your one chance to prove you have the answer the user is desperately looking for. Match their intent, and you'll get the click.
Weave in Your Primary Keyword Naturally
Yes, you absolutely need your primary keyword in there. But it can't feel clunky or forced. When Google sees the searcher's query in your description, it bolds the words, making your snippet pop off the page. This is a powerful visual cue that tells the user, "Hey, this page is for you."
The trick is to use it once, usually near the beginning, in a sentence that sounds completely natural. Keyword stuffing is dead and gone. Today, it’s all about writing for humans first, search engines second. For a deeper dive on how all the meta tags work together, this is a solid guide on how to write meta tags that win SEO and clicks.
Pinpoint a Clear Value Proposition
This is your hook. It’s the "so what?" of your page. With nine other results competing for attention, why should anyone click yours? Your value proposition needs to be sharp, specific, and focused on the benefit.
- Vague (Don't do this): "Our software helps teams manage projects. We offer a variety of features for collaboration and task management to help you succeed."
- Specific & Valuable (Much better): "Simplify your workflow with our project management software. Automate tasks, track progress in real-time, and ship projects 50% faster. Try it free."
See the difference? The second version uses punchy, active language and a hard number (50% faster) that makes the benefit tangible. It immediately answers the user’s unspoken question: "What's in it for me?"
End With a Gentle Nudge (The CTA)
Finally, you need to tell people what to do next. A simple, low-pressure call to action (CTA) can make a huge difference in your click-through rate. You're not trying to be aggressive; you're just pointing them in the right direction.
Some of my favorite CTAs for B2B and SaaS sites are:
- Learn how to...
- Explore the features.
- Get your free demo.
- Start a free trial.
- Discover the solution.
This little prompt turns a passive description into an active invitation, nudging the user to take the next step. Just make sure everything fits. The sweet spot for meta description length has settled in right around 140-160 characters for desktop, which is what you should aim for.
How to Set Meta Descriptions in Webflow
You've crafted the perfect meta description. Now what? Getting it onto your Webflow site is the final, crucial step. Thankfully, Webflow makes this pretty painless, whether you're updating a single page or managing hundreds of blog posts.
Let’s walk through how to handle this efficiently so your metadata never becomes an afterthought.

For Your Core Static Pages
Your main pages—homepage, about us, services, pricing—deserve individual attention. The process here is super direct.
- Open the Pages Panel: In the Webflow Designer, click the Pages icon on the left sidebar.
- Access Page Settings: Hover over the page you want to update and click the gear icon that appears.
- Find SEO Settings: Scroll down to the
SEO Settingssection. - Enter Your Description: Paste your carefully crafted text into the Meta description field.
- Publish: Hit the publish button to push your changes live.
I always recommend doing these high-traffic pages by hand to get the messaging just right.
Dynamic Descriptions for Your CMS Collections
This is where Webflow really flexes its muscles, especially for a SaaS blog or a big B2B resource library. No one has time to write descriptions manually for hundreds of posts. Instead, let's make them dynamic using your CMS fields.
The best way I’ve found to do this is by adding a dedicated "SEO Description" Plain Text field to your CMS Collection. For example, in your 'Blog Posts' collection, this gives you a specific spot for a unique meta description for every single post.
Here’s the workflow that saves me hours:
- Add a Custom Field: In your CMS Collection settings, add a new "Plain Text" field. Name it something obvious, like
SEO Meta Description. I recommend setting a character limit (e.g., 160) and making it a required field so it never gets missed. - Fill it Out: As you or your team create new content, writing a unique description in this field just becomes part of the process.
- Link it to the Template Page: Now, go to the settings for your Collection Template page (e.g., 'Blog Posts Template'). In the Meta description field, instead of typing, click "+ Add Field" and choose your new
SEO Meta Descriptionfield from the list.
Once that's set up, Webflow automatically pulls the unique text from each CMS item right into that page’s metadata. This approach is incredibly scalable and guarantees every blog post has a custom, optimized description without the mind-numbing manual work.
And remember, great metadata is only part of the puzzle. Ensuring your pages perform well is just as critical, and our guide on mobile website optimization has some great tips that go hand-in-hand with these SEO efforts.
Give Your Snippets an Edge with Schema Markup
A well-written meta description is your first pitch to a potential customer, but it's not the only thing they see. To really make your search result pop on a crowded page, you need to bring in the secret weapon of modern SEO: structured data, more commonly known as Schema markup.
Think of it like this: your meta description tells a human what your page is about, while Schema tells Google what your content is. This extra layer of code helps search engines understand the context, which allows them to create "rich snippets"—those eye-catching results with star ratings, FAQs, pricing, and more.
Why Schema Is a Must for Webflow Sites
For anyone running a SaaS or B2B site on Webflow, this is a huge opportunity you can't afford to ignore. Using structured data is no longer a "nice-to-have"; it’s a core part of getting better visibility. Rich snippets can feature things like product reviews or FAQ accordions right in the search results, which drastically boosts click-through rates compared to the old-school blue links. You can find more great insights into how structured data elevates search results on searchengineland.com.
Expert Tip: Schema gives Google the context behind your content, not just the keywords. This deeper understanding often leads to better rankings for relevant queries because Google can match your page to a user's intent with far greater accuracy.
Adding this code turns a standard text result into an interactive preview. It’s the difference between a plain text ad and one with bells and whistles. The one with more information almost always wins the click.
Key Schema Types for B2B and SaaS
Don't get overwhelmed—you don't need to master every single type of Schema. For most SaaS and B2B businesses, just a couple of key types will give you the most bang for your buck.
Here are the two I always start with:
- Organization Schema: This is your digital business card for Google. It clarifies your official company name, logo, and social media links. This helps solidify your brand identity in the SERPs and is often what feeds Google's Knowledge Panel on the right side of the results.
- FAQ Schema: Have a Q&A section on a service or product page? This markup can pull those questions directly into an interactive dropdown list right under your main search result. It immediately makes your listing bigger, pushes competitors down, and answers searchers' questions before they even click.
How to Add Schema in Webflow
Good news: you don't need to be a coding wizard to get this done. The easiest approach is using a free tool like Merkle's Schema Markup Generator, which will spit out the JSON-LD script you need.
Once you have your code, it's just a copy-and-paste job.
- In your Webflow project, go to the Page Settings for the specific page you're working on.
- Scroll down to the "Custom Code" section.
- Paste the script you generated into the
Inside <head> tagbox. - Save and publish your site. That's it.
For site-wide schema like Organization, go to Project Settings > Custom Code and paste it into the Head Code section there. This ensures it's applied to every page of your site.
With just a few clicks, you’ve given your carefully crafted meta description the backup it needs to truly command attention, build authority, and drive more qualified clicks.
How to Test and Optimize Your Meta Descriptions
https://www.youtube.com/embed/VwhSpnPbc_E
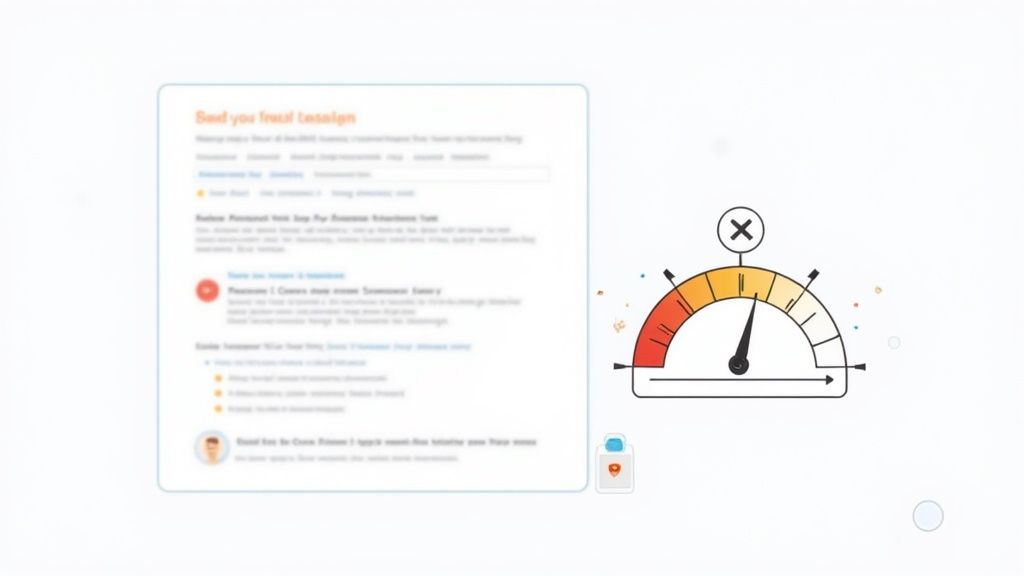
So, you’ve written a fantastic meta description. That’s a great first step, but it’s really only half the job. The real growth comes from continuously testing and tweaking your descriptions over time—this isn’t a set-it-and-forget-it task.
By actually measuring how your descriptions impact your click-through rate (CTR), you can stop guessing and start building a strategy based on hard data. This is how you figure out what truly grabs your audience’s attention and drives more organic traffic.
Find Your Biggest Opportunities in Google Search Console
The best place to start is already at your fingertips: Google Search Console (GSC). You're hunting for the "low-hanging fruit"—pages that Google clearly favors but that users are scrolling right past.
Specifically, you’re looking for pages with high impressions but low CTR. A high impression count is a good sign; it means Google is showing your page to a lot of people. But a low CTR is a red flag that your title tag and meta description just aren't convincing enough to earn the click.
Here’s a quick way to pinpoint these pages for your Webflow site:
- Log into Google Search Console and head over to the Performance report.
- Jump to the Pages tab to see a list of your URLs.
- Make sure you have the "Average CTR" and "Impressions" columns visible.
- Sort the list by Impressions from highest to lowest. This shows you which pages get the most eyeballs in search results.
- Now, look for pages with a CTR that seems unusually low. A page getting 20,000 impressions but only a 1% CTR is a perfect candidate for a meta description rewrite.
Run Simple A/B Tests
Once you've zeroed in on a page, it's time to run a simple test. You don’t need any complicated A/B testing software for this. The idea is to change one variable in your meta description and see what happens.
For instance, you might want to sharpen the call-to-action on a key service page.
- Version A (Original): "Our project management tool helps teams organize tasks and collaborate effectively. Learn more about our features."
- Version B (Test): "Our project management tool helps teams ship projects 50% faster. Start your free trial today and see the difference."
After you've updated the description in your Webflow Page Settings and hit publish, give it some time—about a month is usually enough to gather meaningful data. Then, pop back into GSC. Compare the CTR for that specific page over the last 30 days to the period before you made the change.
Even a small bump from 1% to 1.5% can translate into hundreds of additional clicks over time.
Pro Tip: I highly recommend keeping a simple spreadsheet to track your tests. Log the page URL, the date you made the change, what you modified (e.g., "added a specific benefit," "new CTA"), and the before/after CTR. This creates an invaluable playbook of what resonates with your audience.
Common Meta Description Mistakes to Avoid
Even seasoned marketers can fall into a few common traps. Here's a quick rundown of what to watch out for and how to steer clear.
Common MistakeWhy It's a ProblemHow to Fix ItJust stuffing keywordsIt reads like a robot wrote it and doesn't entice a real human to click. Google often ignores it anyway.Focus on user benefit. Write a compelling sentence that naturally includes your primary keyword.Using the same description everywhereEach page has a unique purpose, and a generic description fails to communicate its specific value.Write a unique, tailored description for every important page on your site. Use Webflow's dynamic fields for CMS content.Going way over the character limitGoogle will cut it off with an ellipsis (...), potentially hiding your key message or call-to-action.Keep it concise. Aim for 150-160 characters to ensure your full message is visible.Being too vague or boringPhrases like "Learn more about our services" don't create urgency or interest.Be specific! Use action verbs, numbers, and a clear benefit. Tell the user exactly what they'll get.Forgetting a call-to-action (CTA)You're not giving the searcher a clear next step or a reason to click your link over others.End with a compelling CTA like "Start Your Free Trial," "Get a Demo," or "Shop the Collection Now."
Avoiding these simple mistakes can make a huge difference in how your pages perform in search results.
After you've crafted and implemented your meta descriptions, remember that ongoing testing is key. For a deeper dive, explore how an AI SEO analytics stack can give you the advanced tools and insights needed to measure and refine your snippets for maximum impact.
Common Questions About Meta Descriptions
Even with a solid framework in hand, some finer points about writing and managing meta descriptions always seem to crop up. Getting these details right on your Webflow site is what separates a good SEO strategy from a great one.
Let's dig into some of the most frequent questions we hear from SaaS and B2B teams.
Does Every Single Page Need a Unique Meta Description?
Ideally, yes—at least for the pages that carry the most weight. Think about your homepage, core service pages, product features, and key landing pages. These are your money-makers, and they absolutely deserve a custom-written description to ensure the message is perfectly dialed in.
But what about a blog with hundreds of posts? Writing each one by hand is a massive time sink and probably not realistic. This is exactly what Webflow's dynamic features are for. Hop into your collection settings and create a template. A well-structured dynamic template is always a better move than letting descriptions duplicate or, worse, letting Google guess what your page is about.
Why Is Google Ignoring My Carefully Written Meta Description?
This happens all the time, so don't take it personally. Google’s number one job is to give the searcher the most relevant snippet for their exact query.
If a sentence buried in your page content happens to be a better, more direct match for a long-tail search term, Google will often grab that instead of your custom description. It's just trying to be helpful.
Don't think of this as a failure. Your job is to write a fantastic "default" description that works as a general summary. Then, make sure your on-page content is clear and well-structured. This way, you're covered for both scenarios. You give Google a great pre-written option, and you also provide it with quality snippets it can pull from the page itself.
Key Takeaway: A strong meta description is your main pitch. But think of well-organized on-page content as Google's high-quality backup plan for hyper-specific searches.
Should I Squeeze My Brand Name In?
For your homepage? 100% yes. It’s your front door, and it reinforces your brand identity right there on the search results page.
But for deeper pages like blog posts or specific service pages, that precious character space is usually better spent on a strong value proposition and relevant keywords. On these pages, the main goal isn't brand recognition; it's earning the click.
If you have a well-known brand that adds a ton of credibility, you might tack it on at the very end if you have room. But never, ever sacrifice a compelling call-to-action or a key benefit just to fit it in. A powerful, action-focused description almost always beats one that just states your name. For more on how to create these connections, check out our guide on building a smart internal linking strategy.
How Should I Handle Paginated Blog Pages?
This is an easy one: you don't need to do anything. Webflow handles this for you automatically.
It applies a canonical tag to paginated pages (like /blog/page/2), which points search engines back to the main collection page (/blog). This little tag tells Google that the first page is the "master" version, preventing any duplicate content issues before they can even start. All you have to do is write one great meta description for the main /blog page.
At Block Studio LLC, we don't just write content; we build revenue engines. We combine expert Webflow development, technical SEO, and conversion-focused content to drive measurable growth for ambitious B2B and SaaS companies. https://www.blockstudio.co