.png)


How to Reduce Website Bounce Rate on Webflow Sites
Tackling your website's bounce rate really comes down to a straightforward process: figure out the problem, smooth out the user experience, and make sure your content delivers on its promise. Once you understand why people are leaving your Webflow site, you can make smart, targeted changes that convince them to stick around, explore, and ultimately convert.
Getting to the Root of Why Visitors Leave
Before you can fix a high bounce rate, you have to play detective. Think of your website as a crime scene, and a bounced visitor is the case you need to crack. The first step is always to gather clues. For us, that means digging into our analytics to see how people are actually behaving on the site. Without solid data, you're just guessing.
A high bounce rate is almost always a symptom of a bigger problem. It's a clear signal that there's a gap between what someone expected to find and what you delivered. This could be anything from a slow-loading page to content that completely misses the mark.
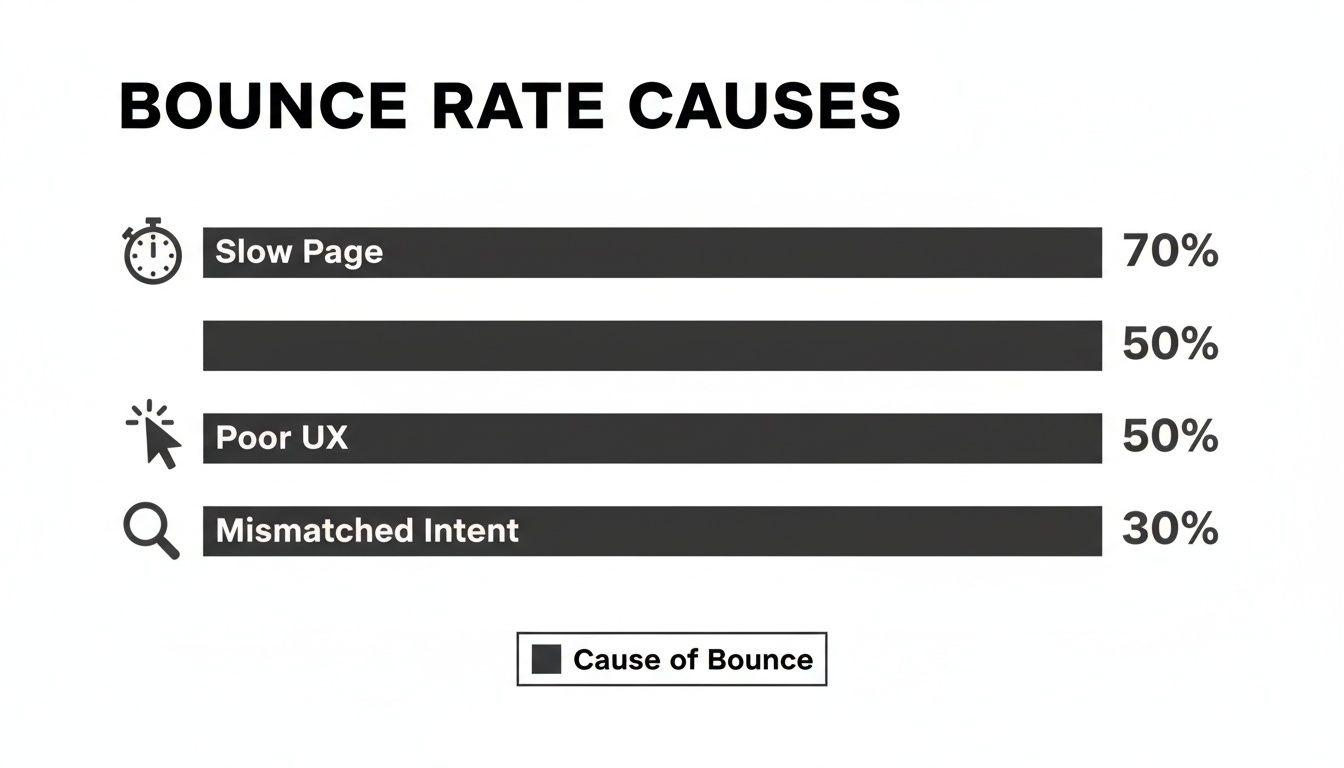
As you can see, the biggest culprits are usually slow pages, a clunky user experience, and a fundamental mismatch between what the user was searching for and the content you provided.
It's Not Always a Bad Thing: Good vs. Bad Bounces
Here’s something a lot of people miss: not every bounce is a disaster. A "good bounce" is when a user lands on a page, gets the exact piece of information they were looking for, and leaves happy. Imagine someone Googles your business hours, lands on your contact page, finds them instantly, and closes the tab. That’s a win, even though it counts as a bounce. They got what they needed.
A "bad bounce," however, is a sign of frustration. This is when someone leaves because:
- The page was taking forever to load.
- They couldn't figure out how to navigate the site.
- The content had nothing to do with their search query.
- The site looked terrible on their phone.
Our mission is to stamp out these bad bounces. By finding and fixing these friction points, we can stop visitors from hitting the back button in annoyance.
Your Bounce Rate Diagnostic Toolkit
To get started, you’ll need a few essential tools to see what’s really going on. The good news is that integrating powerful analytics platforms into a Webflow site is pretty straightforward.
First up is Google Analytics 4 (GA4). It’s important to note that GA4 has shifted the focus from the old "bounce rate" metric to "engagement rate." This new metric is actually more useful—it measures sessions that last longer than 10 seconds, include a conversion, or involve at least two pageviews. If you see a page with a really low engagement rate, that’s your first big clue that something’s off.
But numbers only tell half the story. To see the why behind the data, you need tools like Hotjar or Crazy Egg. These platforms give you heatmaps to see where people are clicking (or trying to click) and session recordings that let you watch a user’s journey in real-time. It’s like looking over their shoulder as they get stuck or frustrated.
This combination of quantitative and qualitative data is incredibly powerful. For a deeper dive into effective strategies, check out this guide on How to Improve Bounce Rate.
Bounce Rate Benchmarks by Traffic Source
Understanding what a 'normal' bounce rate looks like for different channels helps you prioritize your optimization efforts. This table provides industry-standard benchmarks.
Traffic SourceAverage Bounce Rate RangeCommon User IntentOptimization FocusOrganic Search25% - 55%High intent; seeking specific answers or productsContent relevance, clear CTAs, fast load timesPaid Search30% - 60%Very high intent; ready to act or purchaseLanding page alignment with ad copy, simple formsSocial Media40% - 65%Low intent; browsing, discovery, entertainmentEngaging visuals, scannable content, mobile experienceReferral20% - 45%Varies; depends on the context of the referring siteContextual consistency, clear value propositionDirect15% - 40%Highest intent; brand-aware, returning visitorsEasy navigation, updated content, personalized experienceDisplay Ads50% - 75%Very low intent; often accidental clicksStrong visual hook, clear and concise messaging
Keep these ranges in mind as you analyze your own data. A 60% bounce rate from social media might be perfectly fine, but that same number from direct traffic could signal a serious problem.
Designing for Engagement in Webflow
Once you've figured out why people are leaving, it’s time to redesign the experience so they want to stay. A confusing or clunky design is a one-way ticket to a high bounce rate. Your site needs to instantly show its value and give visitors a clear path to follow.
Think of the "above-the-fold" content—what someone sees without scrolling—as your digital handshake. It has to be confident and inviting. That first impression, which is formed in a lightning-fast 50 milliseconds, often decides whether someone sticks around or immediately hits the back button.

Crafting a Clear Visual Path
A killer user experience (UX) isn't about throwing in flashy animations. It’s about clarity. You need to guide the user's eye toward the most important information and actions on the page.
Whitespace is one of your best friends here. It's not just empty space; it's an active design element that gives your content room to breathe. Proper use of whitespace cuts down on cognitive overload, makes text easier to read, and naturally draws attention to crucial elements like your call-to-action (CTA) buttons.
Typography and color are just as important for creating a visual hierarchy. Use big, bold fonts for your main headlines (H1), then scale down for subheadings (H2, H3) and body text. A simple, consistent color palette can signal what's clickable, using a specific color for links and buttons to guide users intuitively.
Building Intuitive Navigation in Webflow
If people can't find what they're looking for, they're gone. It's that simple. Intuitive navigation is absolutely non-negotiable, and Webflow gives you total control to build it right.
A pro tip: for your main navigation bar, use Link Blocks instead of plain text links. This small change gives you way more design freedom. You can control padding and create larger, easier-to-click targets, which makes a world of difference, especially for your mobile visitors.
Here are a few best practices I always follow when building navigation in Webflow:
- Keep it Simple: Don't overwhelm people. Stick to 5-7 essential items in your main menu. Any more than that, and you risk analysis paralysis.
- Use Clear Labels: This isn't the place to get clever with your wording. Use straightforward labels that everyone understands, like "Services," "About," "Pricing," and "Contact."
- Implement a Sticky Nav: In Webflow, it’s easy to set your navigation bar's
position: sticky. This keeps it fixed at the top of the screen as users scroll, giving them an easy out to another page whenever they need it.
The goal is to make getting around your site so effortless that people don't even have to think about it. Every click should feel natural and take them exactly where they expect to go.
This mindset is fundamental to a great user experience. Many of the core principles of designing for engagement are echoed in guides on boosting e-commerce customer experience, where a seamless journey is directly tied to user satisfaction and sales.
Leveraging Webflow’s Power for Engagement
Beyond just a static layout, Webflow is incredible for creating dynamic, interactive experiences that grab attention and encourage people to explore. These little moments of engagement can be the deciding factor that convinces a user to stay.
For starters, you can add subtle hover interactions to buttons and links right inside the Webflow Designer. A slight color shift or a shadow popping up on hover provides instant visual feedback, confirming an element is clickable. It costs you nothing in performance but adds a layer of polish that builds trust.
Mastering Flexbox and Grid is also a game-changer for your page layouts. These are powerful CSS tools that let you build complex, fully responsive designs that look fantastic on any device.
- Flexbox: Perfect for aligning items in one dimension, like a row of navigation links or the features in a pricing card.
- Grid: Your go-to for more complex, two-dimensional layouts, like a blog archive page or a portfolio gallery.
Finally, think about embedding interactive content. Instead of a boring, static page, why not include a short video, a Typeform quiz, or an interactive product demo? These elements turn passive visitors into active participants, which can dramatically increase how long they stay on your site and, in turn, crush your bounce rate. Making these on-page improvements is a central part of many effective conversion rate optimization strategies.
Aligning Your Content with User Intent
So, you've got a sleek design and your site loads in a flash, but people are still leaving almost immediately. What gives? More often than not, a high bounce rate boils down to one simple problem: a disconnect between what your visitor was looking for and what your page actually delivered.
When your content misses the mark, people hit the back button. It’s that simple. The real fix here is to get inside your audience's head and figure out the why behind their search. Are they hunting for a quick answer, a detailed tutorial, or a side-by-side comparison of products? Nail this, and you've built the foundation for content that actually grabs their attention and keeps them around.
Uncovering the Questions Behind the Keywords
Think of your keyword research as detective work. Your job isn’t just to collect popular phrases; it’s to understand the person typing them. Someone searching for "Webflow pricing" has a totally different goal than someone searching for "best Webflow templates for SaaS." The first person wants data, fast. The second is in discovery mode, weighing their options.
Once you see that distinction, you can build a page that delivers immediate value. To really master this, you need a solid handle on the different types of search intent. We've actually put together a deep dive on this, so check out our guide on what search intent is to see how it should shape your entire content strategy.
Getting this right has a huge impact. In fact, a mismatch between the traffic source and the page's purpose is one of the biggest reasons for a high bounce rate. While the median bounce rate across industries hovers in the mid-40s percent, pages that are laser-focused on user intent perform significantly better. You can discover more insights about website statistics on rebootonline.com.
Writing Headlines That Deliver on Their Promise
Your headline is a promise to the reader. If you call it "The Ultimate Guide," it better be the most comprehensive thing they've ever read on the topic. If you promise "5 Quick Tips," the content needs to be short, sharp, and scannable. A clickbait headline that over-promises and under-delivers is a one-way ticket to a bounce.
Here are a few pointers for writing headlines that attract the right people:
- Get Specific: Instead of a generic "How to Improve Your Website," try something like, "5 Webflow Interactions to Instantly Reduce Your Bounce Rate."
- Use Numbers: "7 Reasons Your Landing Page Isn't Converting" is much more concrete and enticing than "Why Your Landing Page Isn't Converting."
- Speak Directly to the Reader: Using words like "You" and "Your" makes the headline feel personal and immediately relevant to their problem.
A great headline sets clear expectations. It tells the visitor, "Yes, you're in the right place, and we have the exact answer you're looking for." Anything less creates uncertainty and encourages them to leave.
Webflow-Specific Content and Linking Strategies
If you're running your site on Webflow, you have some seriously powerful tools at your disposal for keeping visitors engaged. It's about more than just writing a good blog post; it's about creating a web of interconnected content that encourages exploration.
Using the Webflow CMS for Blog Management
The Webflow CMS is brilliant for organizing your articles, case studies, and guides. Use it to structure every post with clear H2s and H3s, making it a breeze for readers to scan and find what they need. And please, break up those giant walls of text! Drop in high-quality images, helpful infographics, or even an embedded video to make complex topics easier to digest.
Building Dynamic Internal Links with Reference Fields
This is one of my favorite features. Instead of painstakingly linking to related articles by hand, you can use Webflow's Reference Field. In your "Blog Posts" collection, just add a Reference Field that points to other posts. This lets you automatically pull a "Related Articles" section onto every page, giving visitors a clear next step. This one small tweak can dramatically lower your bounce rate by guiding them deeper into your site.
Optimizing Open Graph Settings for Social Shares
Don't forget what your content looks like before anyone even clicks on it. In the Webflow page settings, you can customize the Open Graph Title, Description, and Image. A compelling image and a clear, benefit-focused description can make all the difference in click-through rates from social media, ensuring the traffic that lands on your site is already primed and interested.
Getting Your Webflow Site Up to Speed
Let's be blunt: a slow website is a bounce rate machine. Nothing sends visitors running for the back button faster than a page that just won't load. That tiny sliver of time it takes for your site to appear is when a potential customer decides if you're worth their attention. Slow performance creates friction, and friction costs you business.
The link between speed and bounces is brutally direct. I often tell clients that if they want to lower their bounce rate, the first place to look is page speed. Why? Because faster sites just feel better, keep people around, and lead to more conversions. It’s not just a feeling, either—one study found that a staggering 88.5% of people will ditch a website if it loads too slowly. That makes your load time a primary culprit for high bounce rates.
While this can feel like a technical minefield, Webflow actually gives you some powerful, built-in advantages to deliver a lightning-fast experience.
Tame Your Media Assets
I can't tell you how many times I've audited a site where massive, unoptimized images were the number one performance killer. High-resolution photos and videos add serious weight to a page, and every extra kilobyte is another moment a user has to wait. Getting your media in check is your first and most impactful move.
You should always aim to compress images before you even upload them, but Webflow has your back with an automated optimization layer that handles a lot of the grunt work.
- Smart Image Resizing: When you upload a big image, Webflow doesn't just dump it onto the page. It smartly creates several smaller versions. Then, it serves the right one based on the visitor's device, so a phone user isn't stuck downloading a giant desktop banner.
- Automatic WebP Conversion: Webflow automatically converts your JPGs and PNGs to the modern WebP format. This is a huge win for speed, as WebP files are often 25-35% smaller with no visible drop in quality.
- Built-in Lazy Loading: Images that are "below the fold" (off-screen) don't need to load right away. Webflow enables lazy loading by default, so those images only start loading as the user scrolls down. This dramatically speeds up that critical initial page view.
Honestly, the best part is that this all happens behind the scenes. Just by using the platform, you’re already benefiting from a sophisticated system built to make your site fast.
Stop Custom Scripts from Blocking Your Page
Third-party scripts are notorious performance hogs. The code snippets for your analytics, marketing tools, or live chat widgets can actually stop your page from rendering while they load, leaving your visitor staring at a blank screen. It’s a terrible first impression.
Webflow gives you a straightforward way to fix this by letting you defer your scripts.
Head over to your Project Settings > Custom Code. You’ll see two main boxes: one for the <head> and another for the code that goes before the </body> tag.
- Head Code: This spot is for critical scripts that absolutely must run before anything else is visible, like anti-flicker snippets for A/B testing tools. Use it sparingly.
- Body Code: Most of your scripts belong here. Placing them at the end of the body allows all your visual content to load first, making the site feel faster to the user.
When you add a script here, give the browser a hint by adding the defer attribute. It looks like this: <script src="your-script.js" defer></script>. This tells the browser to download the script in the background and only run it after the rest of the page is ready. This one little attribute can easily shave seconds off your load time.
Make the Most of Webflow’s Global CDN
A Content Delivery Network (CDN) is basically a network of servers spread across the globe. Instead of every visitor having to retrieve your site from a single server in Virginia, a CDN serves it from a location much closer to them, whether that's London, Singapore, or Sydney.
Webflow’s hosting is built on top-tier infrastructure from Amazon Web Services (AWS) and Fastly, which means your site is automatically distributed across this global network right out of the box.
This has a massive impact on load times for your international visitors, which in turn helps lower your bounce rate. Someone in Australia can get nearly the same snappy experience as someone in New York. This is non-negotiable for any business with a global audience and is a cornerstone of effective mobile website optimization, since mobile users are often on shakier networks where every millisecond really does count.
Testing and Measuring Your Improvements
Making changes to your website based on gut feelings or "best practices" is a good start, but it's only half the story. If you really want to know what’s driving your bounce rate down, you have to stop guessing and start testing. This is where the real magic happens—turning your good ideas into data-backed decisions that actually move the needle.

This ongoing cycle of experimenting and measuring ensures your efforts aren't wasted. You'll know for certain whether a change worked, instead of just hoping it did.
The A/B Testing Framework for Webflow Sites
A/B testing (or split testing) is the bread and butter of conversion rate optimization. The concept is straightforward: you show two different versions of a page to your audience to see which one performs better. One version is your current page, the "control," and the other is the "variation" with one specific change.
For instance, on your Webflow site, you could test:
- A new headline: Does a benefit-driven headline hook more users than a feature-focused one?
- A different CTA button: Will "Get a Free Demo" get more clicks than "Book a Call"?
- A tweaked page layout: What happens if you move your best testimonials higher up the page?
The golden rule here is to change only one thing at a time. If you change the headline, the button color, and an image all at once, you’ll have no idea which element was actually responsible for the results.
Every good A/B test begins with a solid hypothesis. For example: "Changing the main CTA button text from 'Learn More' to 'Start Your Free Trial' will increase clicks by 15% because the new copy is more direct and action-oriented." This gives your test a clear purpose and a measurable benchmark for success.
Integrating Testing Tools with Webflow
To run these experiments, you’ll need a third-party tool. While the classic Google Optimize is being sunset, its spirit lives on in powerful platforms like VWO, Optimizely, and even the A/B testing features built into Google Analytics 4.
Getting these tools hooked up to your Webflow site is surprisingly simple.
Most A/B testing platforms work by giving you a small JavaScript snippet to add to your site. Here’s how you can do that in Webflow:
- Head over to your Project Settings.
- Click on the Custom Code tab.
- Paste the snippet from your testing tool into the Head Code section.
- Save your changes and Publish your site. That’s it.
This little piece of code lets the testing platform dynamically change elements on your live page for different users, all without you having to build a duplicate page in the Webflow Designer. It's a clean, efficient way to run tests and track behavior.
Moving Beyond Bounce Rate with GA4
While a lower bounce rate is a fantastic goal, it isn't the only metric that matters. The real win is when visitors not only stick around but also take meaningful actions. This is where setting up custom event tracking in Google Analytics 4 (GA4) becomes a game-changer.
Instead of just looking at who stayed and who left, you can start measuring deeper levels of engagement.
Setting Up Scroll Depth Tracking
A great place to start is tracking how far people are actually scrolling. A visitor who reads 75% of a blog post is far more engaged than someone who bails after the first paragraph, even if neither of them clicked to another page. You can set up GA4 to fire events when a user hits key milestones like 25%, 50%, 75%, and 90% of a page's length.
Tracking Conversions and Micro-Conversions
Think about what a successful visit actually looks like for your site. Is it a form submission? A newsletter signup? Someone watching a product video? Each of these actions can be configured as a conversion event in GA4. This data paints a much richer picture of user engagement and helps you prove that your changes aren't just keeping people on the page, but are actively pushing them toward your business goals.
Common Questions About Bounce Rate
Even with a solid plan in place, tackling bounce rate often brings up a few tricky questions. I get these a lot from Webflow site owners, so let's clear the air on some of the most common ones.
What Is a Good Bounce Rate for a Webflow Site?
This is the classic "it depends" answer, but it's the truth. A "good" number really hinges on the page's job and where its traffic comes from.
That said, here are some reliable benchmarks I use:
- E-commerce & Lead Gen Pages: You'll want to aim for 20% to 45%. People landing here usually have a specific goal, so you want them to stick around and take action. A low bounce rate is a great sign.
- Content & Blog Pages: Don't panic if you see numbers between 35% and 60%. Someone might land on your blog, find the exact answer they needed in a single paragraph, and leave happy. That's actually a "good bounce"—a mission accomplished.
- Landing Pages: These can be all over the map, from 25% to 70%. A highly focused landing page with one clear call to action might see a higher bounce rate if users aren't ready to commit, and that’s often part of the game.
If you’re seeing numbers well above these ranges for your page type, it’s a clear signal that something needs a closer look.
Does a High Bounce Rate Hurt My SEO Rankings?
The link between bounce rate and SEO isn't direct, but it's definitely there. While Google has never come out and said, "We use bounce rate to rank pages," a high bounce rate is often a symptom of problems that absolutely hurt your SEO.
Think of it as a smoke alarm. The alarm itself isn't the fire, but it's telling you there's a problem.
A high bounce rate can indicate:
- A poor user experience (UX): Is your site slow? Confusing to navigate? These issues send people running, and Google definitely cares about page experience.
- A mismatch with search intent: If a user clicks your link expecting one thing and gets another, they’ll hit the back button in seconds. This "pogo-sticking" tells search engines your page isn't the right answer for that query.
So, instead of obsessing over the number itself for SEO, treat a high bounce rate as a critical diagnostic tool pointing to a poor user experience.
My Key Takeaway: When you fix the root causes of a high bounce rate—like boosting site speed, sharpening your content to match user intent, and making navigation a breeze—your SEO performance naturally improves as a result.
How Is Bounce Rate Different in GA4?
This is a big point of confusion, as Google Analytics 4 (GA4) completely changed the game. The old Universal Analytics (UA) was simple: a bounce was any session where the user only viewed a single page.
GA4, however, measures the opposite: "engagement rate."
A session is now considered "engaged" if the visitor does any of these things:
- Stays for longer than 10 seconds.
- Fires off a conversion event.
- Looks at two or more pages.
Under this new model, the bounce rate is just the percentage of sessions that weren't engaged. It’s a much smarter metric. It no longer punishes you for a user who lands on a blog post, spends 45 seconds reading the information they need, and then leaves. GA4 understands that this was a successful visit, not a failure.
At Block Studio, we do more than just build websites; we turn them into powerful growth engines. Our team handles everything from technical SEO and content strategy to conversion rate optimization, all working together to deliver compounding results. If you're ready to get more qualified traffic and turn those visitors into customers, see how we can help at https://www.blockstudio.co.