.png)

A Guide to Organic Lead Generation on Webflow
Organic lead generation isn't about chasing quick wins. It’s the art of attracting customers naturally through things like SEO, great content, and being genuinely helpful online. You're not paying for eyeballs with ads; you're earning their attention. This approach consistently brings in higher-quality leads at a much lower long-term cost, building a growth asset that works for you around the clock.
Why Organic Lead Generation Is a Sustainable Growth Engine
If you're running a B2B or SaaS company on Webflow, you know the pressure is always on for growth. It often feels like you're stuck choosing between speed and sustainability. Paid ads give you that instant gratification, but it's a bit like renting your audience—the moment you turn off the spend, the traffic vanishes. It's a costly treadmill that rarely builds anything permanent.
This is exactly where organic lead generation completely changes the game.
Shifting your focus to organic isn't just another marketing play; you're building a core business asset. Think of it as digging a defensible moat around your business that paid channels can never truly replicate. Every article you publish, every keyword you rank for, and every backlink you earn becomes part of a system that works 24/7, pulling in qualified prospects while you sleep.
The Compounding Value of Organic Efforts
Unlike a paid ad that expires, your organic marketing efforts build on each other. A blog post you write today can continue generating leads for years, and its value actually increases over time as it climbs the search rankings and builds authority.
This approach also builds a massive amount of trust. When a potential customer discovers you through a genuinely helpful article instead of an intrusive ad, you start that relationship on the right foot—by providing value, not by interrupting their day.
It's a powerful trifecta of benefits that creates a virtuous cycle.
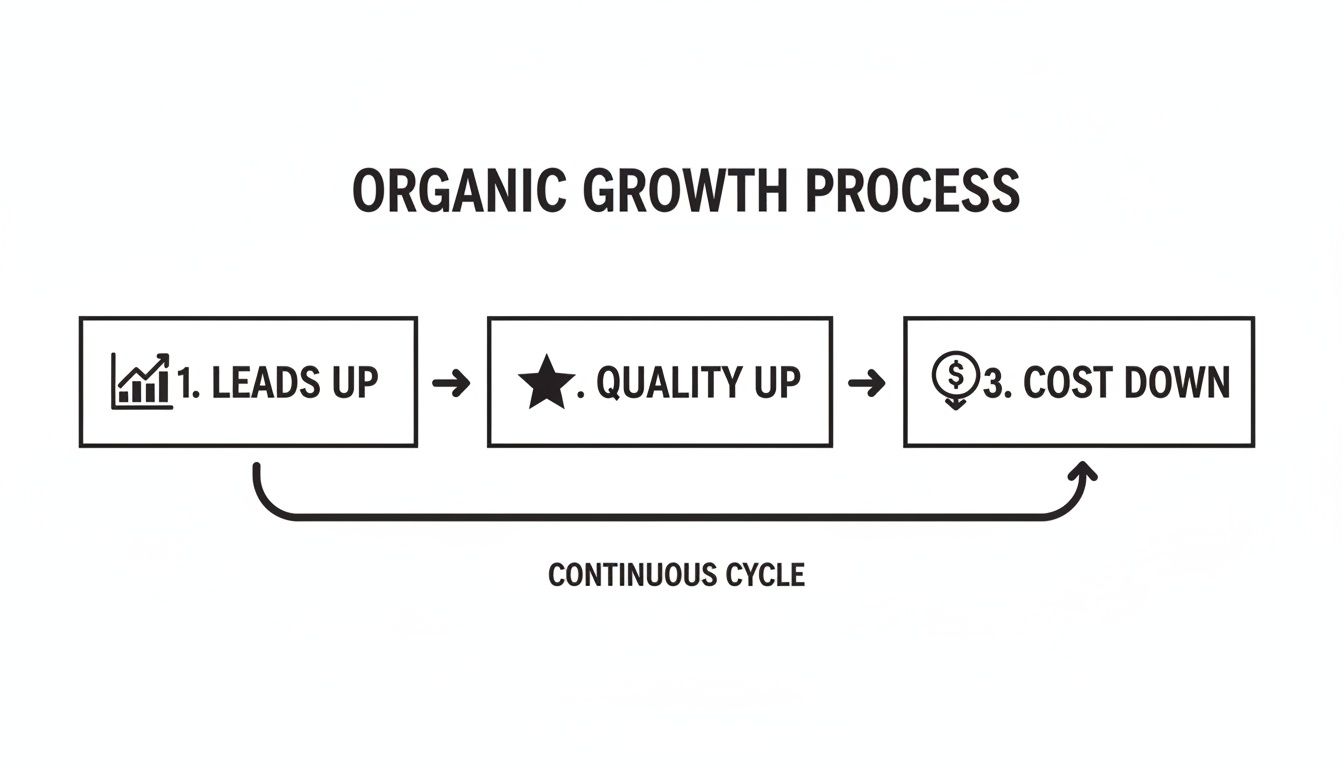
As this process matures, you don't just get more leads. You get better leads, all while your customer acquisition cost steadily drops.
Measurable Impact on Growth and ROI
The numbers don't lie. Recent data on B2B companies that went all-in on content and organic channels showed a 36.4% surge in lead volume. But here's the kicker: the lead quality shot through the roof, with SQL conversion rates jumping by a massive 76.9%.
This strategic pivot also made their marketing spend far more efficient. The average cost-per-lead fell by 23.3%, dropping from $215 down to just $165.
An organic lead generation engine turns your Webflow site from a static brochure into an automated, revenue-driving machine. It's the most reliable path to slashing customer acquisition costs and achieving scalable, long-term growth.
To see how top-tier companies are putting this into practice, check out these proven SaaS organic growth strategies. Now, let’s get into the step-by-step framework for building this engine yourself.
Laying the Foundation with Audience and Keyword Research

Before a single line of content gets written or a landing page is designed, the real work of organic lead generation starts with a fundamental question: who are we actually trying to reach?
A vague idea of your customer won't cut it. To build a strategy that pulls in genuinely qualified leads, you have to dig much deeper than simple demographics. It's about getting into the head of your Ideal Customer Profile (ICP).
What are their daily frustrations? What specific language do they use to describe their problems? What solutions have they already tried—and why did they fail? Answering these questions turns your marketing from a shot in the dark into a targeted, effective operation. You stop guessing and start creating content you know your audience is looking for.
Uncovering Customer Pain Points and Language
Your best source of truth isn't a complex analytics dashboard; it's your existing customers. I always recommend scheduling quick, 15-minute chats with a handful of your best clients. The goal isn't to sell them anything—it's to listen.
Here are a few conversation starters I've found incredibly effective:
- "Before you found us, what was the biggest roadblock you were hitting with [the problem your product solves]?"
- "Can you remember the exact words you typed into Google when you were looking for help?"
- "What other tools or workarounds did you try before switching to our platform?"
The language they use is pure gold. For example, you might call your feature an "automated workflow integration," but your customers might be searching for "how to connect my CRM to my email tool." That small difference is everything in SEO.
Beyond your own customers, digital communities are a treasure trove of unfiltered insights. Spend time lurking in subreddits like r/SaaS or industry-specific Slack channels where your audience hangs out. Look for threads where people are asking for help or venting about problems. These are your future blog posts, handed to you on a silver platter.
Translating Insights into a Keyword Map
Once you've got a handle on your audience's problems and the words they use, it's time to translate that knowledge into a strategic keyword map. This isn't just a long list of terms from a keyword tool. It's a blueprint connecting real human search queries to specific stages of their buying journey.
The key is to analyze keywords based on intent. Understanding the "why" behind a search is critical.
To help visualize this, I use a simple framework to connect search intent with the right content format for a Webflow site.
Keyword Intent and Content Type Mapping
Mapping your keywords this way ensures you're creating content that meets people exactly where they are in their decision-making process. For a deeper dive into defining these customer profiles, check out our guide on how to create buyer personas.
Pro Tip: Fire up a tool like Ahrefs or Semrush and see what keywords your direct competitors are ranking for. Pay close attention to the pages driving the most traffic to their site—it’s a proven roadmap showing what topics already resonate with your shared audience.
This level of detailed research is what separates a generic content strategy from a high-performance organic lead generation engine.
Prioritizing High-Intent Keywords
Not all keywords are created equal. High search volume looks impressive on a spreadsheet, but the real value for a growing SaaS business lies in commercial intent.
These are often long-tail keywords that signal a user is getting close to making a purchase. They're usually more specific, less competitive, and perfect for driving traffic that actually converts.
Zero in on phrases that include buying-signal modifiers:
- Alternatives: "Salesforce alternatives"
- Comparison: "Webflow vs. WordPress SEO"
- Pricing/Cost: "Hubspot pricing for startups"
- Use Case: "project management software for remote teams"
Building your initial content around these high-intent keywords ensures the traffic you attract from day one is far more likely to convert. This foundational work underpins everything else. It’s no surprise that content marketing is now responsible for 51.5% of all leads generated, crushing paid social (14.9%) and paid search (11.9%). SEO-driven leads are consistently ranked as the highest quality, and it all starts here.
Building Your Content Engine in Webflow
So you've done the hard work of understanding your audience and mapping out your keywords. Now, it's time to build the machinery that will pump out high-value content consistently. A successful organic lead generation strategy isn’t about just winging it with a few blog posts here and there. It's about creating a repeatable system—a true content engine—that turns your Webflow site into an authority in your space.
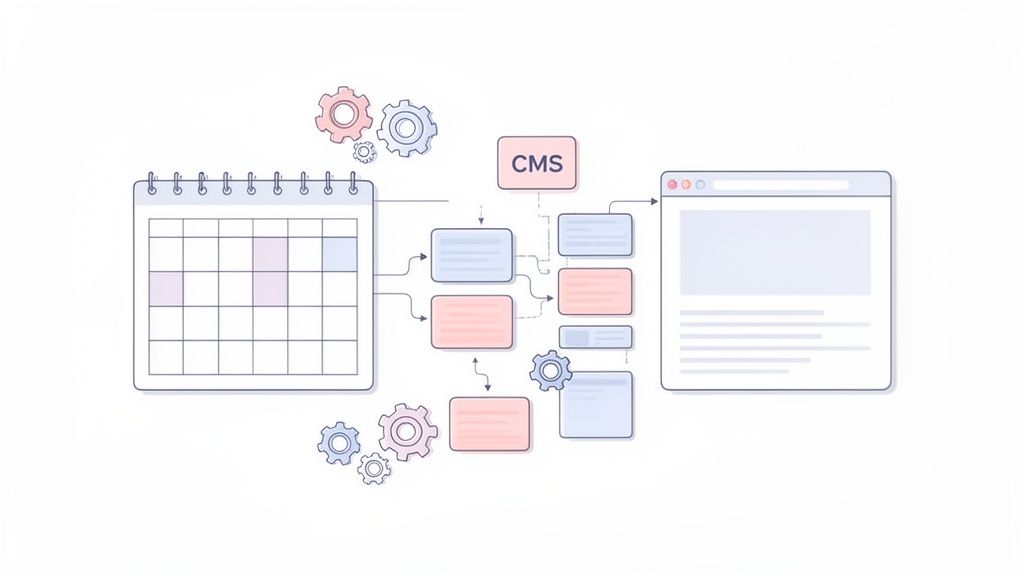
Think of it this way: your keyword strategy is the blueprint. Your content engine is the factory that turns that blueprint into articles, guides, and comparison pages that actually attract and convert your ideal customers. This is where Webflow’s powerful CMS really starts to flex its muscles.
From Keywords to a Cohesive Content Calendar
Your keyword map is the starting point for your content calendar, not the endpoint. The real magic happens when you group related keywords into "topic clusters." A topic cluster is simply a collection of articles all centered around one core, high-level theme. This is a game-changer for SEO because it screams to search engines that you're an expert on that subject.
Every topic cluster has two key components:
- Pillar Page: This is your big, comprehensive guide on a broad topic, like "The Ultimate Guide to Customer Onboarding for SaaS." It targets a high-volume, competitive keyword.
- Cluster Content: These are shorter, more focused articles that dive into long-tail keywords related to the pillar. Think "best customer onboarding email templates" or "how to measure onboarding success." Every one of these articles links back to your main pillar page.
This structure does more than just keep you organized. It actively builds your topical authority, which is absolutely essential if you want to rank in a crowded B2B market. When you understand how to develop a content strategy that truly works, you can build a calendar that serves your audience and dominates search results from day one.
How to Build Topic Clusters in the Webflow CMS
Webflow’s CMS feels like it was practically built for this model. You can set up a "Pillar Pages" collection and a separate "Blog Posts" collection. Then, the secret sauce is using reference fields to link your cluster articles directly to their pillar page. This small step makes managing your internal links incredibly simple and scalable.
For instance, in your blog post template, just add a "Related Pillar" reference field. Now, every time you create a new article, you can quickly associate it with its parent topic. It's a clean, elegant way to build a site architecture that search engines absolutely love.
When you use Webflow's CMS collections to organize your pillar and cluster content, you're not just tidying up your blog. You're weaving an interconnected web of expertise that boosts the SEO performance of your entire site.
Suddenly, every piece of content has a clear purpose and directly supports your larger goal of generating organic leads.
A Scalable Content Workflow, Right Inside Webflow
To make all this run smoothly, you need a defined workflow. A well-oiled content production process cuts down on the back-and-forth and lets your team focus on creating great content, not managing logistics. We’ve had a ton of success helping teams implement a streamlined content production workflow that takes an idea all the way to a published article.
Here's a practical way to set this up directly inside your Webflow project:
Build a Smart Blog Post Template: Start by designing a CMS template for your blog posts. Go beyond just the content body and pre-populate it with dedicated fields for on-page SEO essentials like
Meta Title,Meta Description, andOpen Graph Image. You could even add a simple checklist field to ensure writers tick off key optimization tasks.Empower Your Team with the Editor: Train your team to do more than just write in the Webflow Editor. Show them how to fill out the SEO fields you created. Teach them what makes a compelling, keyword-focused meta title and description—this is what earns the click from the search results page.
Don't Forget Image SEO: This is a classic blind spot for so many teams. In your Webflow CMS, add a plain text field specifically for
Image Alt Text. This forces anyone uploading a featured image to write a proper description, which is huge for both accessibility and ranking in image searches.Manage Your Pipeline with Status Fields: Add a "Status" dropdown field to your Blog Posts collection. Use simple, clear options like
Draft,In Review, andReady to Publish. This gives you an instant, at-a-glance overview of your entire content pipeline without ever leaving the Webflow dashboard. No more messy spreadsheets.
With this setup, your Webflow project becomes the command center for your entire content operation. It makes the whole process of organic lead generation far more organized and, ultimately, much more effective.
Fine-Tuning Your Webflow Site for Technical SEO
Let’s be honest: even the most amazing content strategy is dead in the water if Google can't crawl, index, and make sense of your website. This is where technical SEO comes into play. It's the bedrock that all your organic lead generation efforts are built upon.
The great thing about using Webflow is that it handles a lot of the heavy lifting for you. But there are a few specific settings you need to master to take your site from "good" to "great" in the eyes of search engines.
Think of your content as the engine of a race car. Technical SEO is the chassis, the tires, and the aerodynamics. Without that solid framework, all that horsepower goes to waste. The good news? Webflow gives you direct access to the controls that matter most.
Keeping Your URLs and Redirects in Check
One of the fastest ways to tank your SEO is by changing a page's URL and forgetting to tell search engines where it moved. This creates broken links, confuses users, and—worst of all—wipes out all the valuable link equity you've worked so hard to build.
Thankfully, Webflow has a built-in 301 redirect manager that makes this a non-issue. A 301 is just a permanent instruction telling browsers and search engines, "Hey, this page moved for good. Here’s the new address." It’s essential anytime you tweak a blog post slug or reorganize your service pages.
Here's how simple it is to set up right inside your Webflow project:
- Head over to your project's Site Settings.
- Click on the Publishing tab.
- Scroll down until you find the 301 Redirects section.
- In the "Old Path" field, type the old slug (like
/old-blog-post). In the "Redirect to Path" field, enter the new one (like/new-and-improved-post). - Hit "Add Redirect Path" and publish your site. That's it.
All traffic and authority from the old URL will now flow seamlessly to the new one. Making this a habit is probably one of the highest-impact, lowest-effort things you can do for your site's long-term health.
Taming Duplicate Content with Canonical Tags
Duplicate content can be a silent killer for your SEO. It often happens without you even realizing it, especially on a CMS-driven site. When the same (or very similar) content shows up on multiple URLs, Google gets confused about which version is the "real" one and should get the ranking credit.
This is exactly what the canonical tag was invented for. It's a small snippet of code in your page’s header that basically tells Google, "Of all the pages that look like this, this one is the master copy."
Here's how to set it for your entire Webflow site:
- Go to Site Settings > SEO.
- Scroll to the Global Canonical Tag URL section.
- Enter your site's primary domain (e.g.,
https://www.yourdomain.com). This ensures search engines prioritize your main domain over any subdomains likeyourdomain.webflow.io.
For specific CMS Collection Pages, like a blog post, you can add this custom code to the <head> tag in the page settings to ensure each item points to itself:<link rel="canonical" href="https://www.yourdomain.com{{wf_path}}"/>
As you can see, Webflow gives you a straightforward interface for these crucial SEO settings, putting you in direct control of how search engines interpret your site structure.
Speeding Things Up with Webflow's Image Settings
Site speed isn't just a nice-to-have; it's a huge ranking factor. And nothing kills load times faster than giant, unoptimized images. Slow sites frustrate users and send your conversion rates plummeting. Google's own performance metrics, the Core Web Vitals, are heavily influenced by how quickly your visual content loads.
Webflow gives you two incredibly powerful, built-in tools to handle this:
- Lazy Loading: This feature is brilliant. Instead of trying to load every single image on a page at once, it only loads the images that are currently on the user's screen. As they scroll, new images load just before they come into view. To turn it on, just select an image, head to the Element Settings panel (D), and switch the
Loadsetting fromAutotoLazy. - Responsive Images: This one is automatic. When you upload an image to your Asset Panel or a CMS field, Webflow automatically creates several smaller versions. Then, it serves the most appropriately sized image based on the user's device. So, someone on a phone gets a small, fast-loading image instead of having to download a massive desktop-sized one.
Taking a few minutes to enable lazy loading and letting Webflow handle responsive images is one of the quickest wins for improving your Core Web Vitals. A faster site means a better user experience, which directly supports your organic lead generation by keeping people on the page long enough to convert.
Using Structure and Schema to Stand Out
Finally, never underestimate the power of a well-structured page. It helps both users and search engines understand your content at a glance. Always follow a logical heading hierarchy: one—and only one—H1 for the main page title, H2s for the major sections, and H3s for the subsections within them. This isn’t just for looks; it creates a clear outline of your content.
Want to take it a step further? Implement Schema markup. Think of it as a layer of extra information you give to search engines to help them understand the context of your content. This is what powers those "rich snippets" you see in search results, like star ratings, event details, or FAQ dropdowns.
You can add Schema to any Webflow page by simply pasting the JSON-LD code (which you can create with a free online generator) into the custom code area in your page settings. It’s a small technical tweak that can make your site much more visible in the search results.
Turning Webflow Traffic into Real Leads
Getting people to your Webflow site is a huge win, but it's only half the story. The real litmus test for any organic lead generation effort is turning those visitors into actual, qualified leads. This is where a relentless focus on Conversion Rate Optimization (CRO) transforms your traffic into tangible business growth.
Think of it this way: a page with tons of visitors but no conversions is just a digital billboard. A high-converting page, on the other hand, is like having an automated salesperson working for you 24/7. Luckily, Webflow gives you all the tools you need to build and fine-tune these conversion funnels.
Designing Landing Pages That Actually Convert
Your landing page is the moment of truth. It's the handshake, the first impression—the point where a visitor decides if they trust you enough to hand over their contact details. A great landing page isn't about flashy animations; it's about clarity, value, and making the user's decision as easy as possible.
Here’s a quick Webflow tutorial for a high-converting structure:
- Use a Symbol for Your Navbar & Footer: Create a simplified version of your site's navigation and footer specifically for landing pages, removing distracting links. Turn them into Symbols in Webflow. This ensures a consistent, focused experience across all your campaigns.
- Leverage Webflow's Grid for Layouts: Use the Grid element to create a clean, organized layout for your key selling points and social proof. It makes it easy to align testimonials, logos, and feature blocks for a professional look that builds trust.
- Create Reusable CTA Sections: Build your primary call-to-action section and save it as a Component. Now you can drop this optimized, conversion-focused section onto any page in seconds, ensuring consistency and saving valuable design time.
The beauty of Webflow is how easy it is to clone and tweak your landing pages. You can A/B test different headlines, button colors, or testimonial placements without needing a developer. This iterative process is how you dial in performance over time. If you need more inspiration, there are tons of conversion rate optimization strategies you can apply directly to your Webflow builds.
Nailing Your Forms and CTAs in Webflow
The form is your final hurdle, and it’s often where prospects get cold feet. A long, complicated form can feel like an interrogation and scare off even the most interested people.
A killer tactic we use is the multi-step form, which is surprisingly easy to set up with Webflow Interactions. Instead of hitting someone with ten fields at once, you break it down.
Step 1: Just ask for their name and email. It’s a low-commitment ask.
Step 2: Once they've submitted that, they're already invested. Now you can ask for the heavier-hitting details like company size or job title.
This technique, known as progressive disclosure, almost always boosts form completion rates.
Don't make your visitors think. Your Call-to-Action (CTA) should be impossible to miss and use clear, action-oriented language. In the Webflow Designer, make your CTA button a different color from your brand's primary color to make it pop. Use the built-in "Hover" state to add a subtle visual effect, like a slight color change or shadow lift, to make it more interactive and enticing.
Automating the Hand-Off: Lead Delivery and Nurturing
The experience can't just stop once someone clicks "submit." You need an immediate, automated system to deliver on your promise and start building a relationship. This is where you connect Webflow to your marketing automation platform, like HubSpot or Mailchimp.
Using an integration tool like Zapier or Make, you can set up a simple but powerful workflow that triggers the moment a form is submitted:
- Instant Delivery: The first email hits their inbox immediately, giving them the download link or resource they asked for. No waiting.
- Smart Follow-Up: A few days later, a second automated email can check in. Maybe you offer another related piece of content or simply ask if they have any questions.
This kind of automation ensures every new lead gets a consistent and valuable experience, gently guiding them down your funnel without any manual work.
And it's not just a nice-to-have. The lead generation solutions market is projected to hit $21.43 billion by 2033 for a reason. Companies that get this right see massive returns, like a 50% increase in sales-ready leads. You can dig into more of these powerful lead generation statistics to see the impact. This level of automation is what turns your Webflow site from a simple brochure into a core part of your sales engine.
Common Questions About Webflow Lead Generation

Once you start digging into a real organic lead generation strategy, you're bound to have questions. This is a serious commitment, and it's completely normal to wonder about timelines, resources, and what "good" actually looks like.
Let's tackle some of the most common questions I hear from Webflow users when they decide to get serious about SEO and content. My goal here is to give you straight, no-fluff answers to help you sidestep common roadblocks and stay focused on what matters: long-term growth.
How Long Does It Take to See Results?
This is always the first question, and the honest answer is that organic growth is a long game. It's a marathon, not a sprint. While you might spot some encouraging little traffic bumps within 3 to 4 months from technical SEO fixes and your first few pieces of content, the real, meaningful flow of qualified leads usually starts to build between 6 and 12 months.
Of course, this timeline depends on a few things: how competitive your industry is, your site's domain authority right now, and how consistently you can actually execute your plan.
The key thing to remember is that unlike paid ads, the results from your organic efforts don't disappear when you turn off the spend. They compound. Your work builds on itself month after month as your content gains authority and climbs the rankings.
Can I Handle Webflow SEO and Content Myself?
It's definitely possible, especially if you have a dedicated marketer on your team who's comfortable with content, SEO, and knows their way around Webflow. But let's be realistic—the process involves a lot of moving parts. You're juggling technical audits, deep keyword research, consistent content production, and conversion optimization, all at once.
For most growth-stage companies, the biggest hurdles are time and specialized expertise. Trying to wear all those hats can quickly become overwhelming. This is often why teams decide to bring in a specialized agency. You get a unified team that manages the entire process, making sure no piece of the puzzle gets missed and ultimately speeding up your path to seeing real results.
What Are the Most Important Metrics to Track?
It’s easy to get obsessed with organic traffic numbers, but that's a vanity metric. Vanity metrics don't pay the bills—qualified leads do. The only numbers that truly matter are the ones tied directly to business goals.
Here are the key performance indicators (KPIs) that should be on your dashboard:
- Marketing Qualified Leads (MQLs) coming directly from your organic channel.
- Sales Qualified Leads (SQLs) and the MQL-to-SQL conversion rate.
- Cost Per Lead (CPL) calculated for your organic efforts over time.
- Keyword Rankings for your most important, high-intent keywords.
- Conversion Rates on your key landing pages and blog post CTAs.
Tracking these in a tool like Google Analytics or your CRM gives you an undeniable picture of your return on investment.
How Does Webflow Compare to WordPress for SEO?
Out of the box, Webflow gives you an incredible foundation for SEO. It’s known for its exceptionally clean code, blazing-fast hosting on a global CDN, and granular control over SEO settings without needing a pile of plugins. This setup makes it far easier to maintain technical health and nail high scores on things like Core Web Vitals.
Now, can a perfectly tuned WordPress site rank just as well? Absolutely. But it often takes a lot more ongoing maintenance and a complex stack of plugins to do what Webflow does natively.
At the end of the day, success isn't really about the platform. It's about the quality of your strategy and how consistently you can execute it.
Ready to turn your Webflow site into a consistent source of qualified leads? The team at Block Studio specializes in building and managing end-to-end organic growth engines for ambitious B2B companies. We combine expert Webflow development with data-driven SEO and content strategy to deliver compounding results. Schedule a call with us today and let's build your revenue engine.