.png)


Your Essential Webflow Website Migration Checklist: 10 Steps for 2025
Migrating your website feels like a high-stakes operation, especially when moving to a powerful platform like Webflow. One wrong move can tank your SEO rankings, break user experience, and erase years of hard work. The difference between a seamless transition and a digital disaster isn't luck; it's meticulous planning and flawless execution. This is where a detailed website migration checklist becomes your most critical asset, turning a potentially chaotic process into a manageable, step-by-step project.
This comprehensive guide is designed specifically for ambitious teams and Webflow site owners who demand precision. We won't just tell you what to do; we will show you how to do it with actionable steps and Webflow-specific tutorials. From pre-launch audits and redirect mapping to post-launch monitoring and performance validation, this checklist covers every essential phase. We will detail the exact procedures for safeguarding your SEO equity, ensuring functional integrity, and maintaining a positive user experience throughout the move.
By following this 10-point roadmap, you'll learn to:
- Audit and prepare your existing site to prevent data loss and identify hidden issues.
- Execute a technical migration with specific instructions for DNS, redirects, and content transfer.
- Validate and monitor post-launch to confirm success and quickly address any problems.
This isn't just a list of tasks. It's a strategic framework for ensuring your Webflow migration is not just a platform change, but a significant step forward that accelerates your growth and enhances your digital presence. Let's begin.
1. Perform a Comprehensive Pre-Migration Audit
Before you can build your new house, you need a perfect blueprint of the old one. A comprehensive pre-migration audit is the foundational step in any successful website migration checklist, providing a complete inventory of your current site's assets, performance metrics, and technical health. This audit is about documenting what to keep, what to improve, and what to discard, ensuring no valuable content or SEO equity is lost during the transition to Webflow.
This process involves a deep dive into your site’s structure, content, and technical SEO. For example, a B2B SaaS company might audit its blog to identify the top 10% of posts driving demo requests, ensuring these are prioritized. Similarly, an e-commerce brand could analyze its product pages to prune discontinued items and fix pages with low engagement before the move. Skipping this step is like navigating without a map; you invite unnecessary risks, from traffic loss to broken user journeys.
Key Audit Actions
To get a complete picture, your audit must cover several critical areas. To ensure every aspect of your current website is scrutinized, consider consulting a thorough due diligence checklist as part of your initial audit.
- Content & URL Inventory: Use a tool like Screaming Frog to crawl your entire site. Export a master list of all URLs with their corresponding metadata (title tags, meta descriptions, H1s), word count, and status codes.
- Performance Baselining: Document key performance indicators from Google Analytics and Google Search Console. Record current organic traffic levels, keyword rankings for top pages, conversion rates, and bounce rates.
- Technical SEO Health: Identify existing issues like broken links, duplicate content, slow page speed, or improper canonicalization. For a deeper understanding of this process, you can explore this guide on how to conduct a detailed SEO audit.
- Webflow-Specific Check: Document any third-party integrations, custom code, or complex functionalities (like calculators or member portals) that need to be replicated in your new Webflow environment. Webflow Tutorial: Check if your current site relies on plugins that Webflow doesn't natively support. For example, if you have a complex search function, plan to integrate a third-party service like Algolia into your Webflow project.
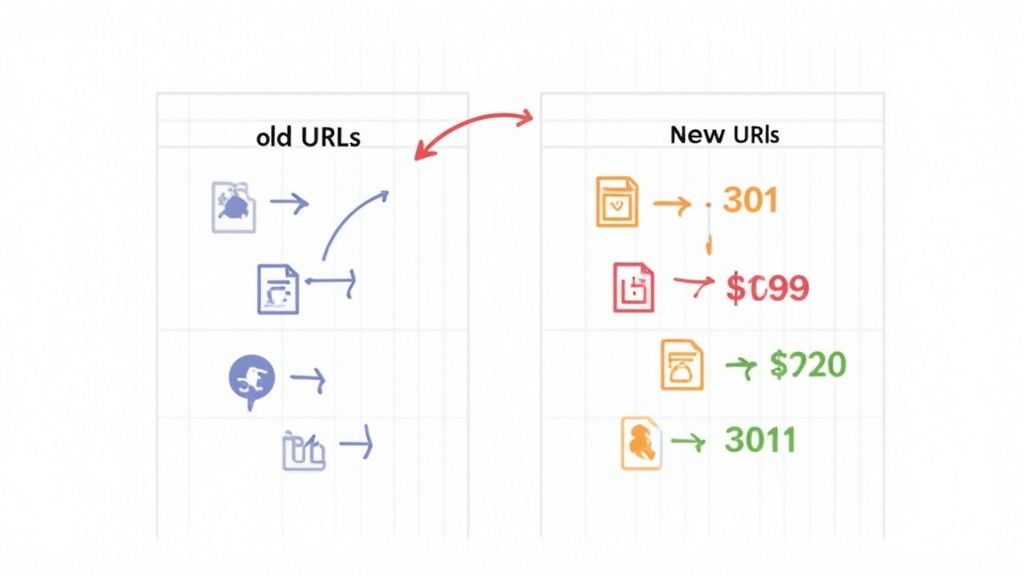
2. Create and Test a Complete URL Mapping Strategy
Once you've audited your old site, the next step is to create the new address book for your content. A URL mapping strategy is the critical process of documenting every old URL and assigning it a corresponding new URL on your Webflow site. This map is the foundation for your redirect plan, ensuring that users and search engines trying to access old links are seamlessly sent to the correct new page, preserving user experience and hard-earned SEO authority.
This isn't just about avoiding 404 errors; it’s about strategically transferring link equity. For example, when HubSpot migrated its massive blog, it meticulously mapped thousands of URLs to prevent a catastrophic drop in organic traffic. Similarly, a technology news site like TechCrunch, which constantly restructures, relies on precise redirect mapping to maintain its high rankings. Neglecting this step in your website migration checklist guarantees you will lose traffic, frustrate users, and damage your SEO performance.
Key Mapping Actions
A meticulous URL map is non-negotiable. It guides your technical implementation and acts as a single source of truth for your migration team. This process is deeply connected to your new information architecture, as you can discover by reviewing best practices for site architecture for SEO.
- Build the Master Spreadsheet: Using the URL inventory from your audit, create a two-column spreadsheet. Column A lists every "Old URL," and Column B is for the corresponding "New URL" on the Webflow site.
- Use 301 Redirects: For any content that has moved permanently to a new address, you must use a 301 redirect. This tells search engines that the move is permanent and that they should pass along all link equity to the new page. Avoid 302 (temporary) redirects unless the move is genuinely temporary.
- Minimize Redirect Chains: Ensure your map points the old URL directly to its final new URL. Avoid mapping
URL A -> URL B -> URL C, as this slows down page load times and can dilute SEO value. - Webflow-Specific Redirects: Webflow Tutorial: In your Webflow project, go to Site Settings > Publishing > 301 Redirects. Here, you can add redirects one-by-one in the "Old Path" and "Redirect to Path" fields. For a large number of redirects, format your spreadsheet with the old path in the first column and the new path in the second, save it as a CSV, and upload it directly.
3. Back Up All Website Data and Content
Before initiating any changes, creating a complete backup of your entire website is a non-negotiable insurance policy. This crucial step in any website migration checklist involves creating a full, verified copy of all your files, databases, and configurations. It acts as a safety net, protecting years of work from potential data corruption, loss, or unforeseen technical failures during the transfer to Webflow.

Think of it as creating a perfect snapshot of your digital presence at a single moment in time. For instance, a WordPress site owner moving to Webflow would use their host’s one-click backup feature (like those offered by Kinsta or WP Engine) to save the wp-content folder and the SQL database. This ensures that if the new Webflow site fails to launch correctly or critical data is missing post-migration, you can quickly restore the original site and avoid disastrous downtime. Neglecting this step introduces an unacceptable level of risk to your business continuity.
Key Backup Actions
A comprehensive backup strategy involves more than just clicking a button. To ensure your safety net is reliable and accessible when you need it most, follow these critical procedures.
- Create Multiple Copies: Don't rely on a single backup. Store copies in different locations, such as a local drive, a separate cloud storage provider (like Amazon S3 or Google Drive), and your web host's server. This redundancy protects against a single point of failure.
- Test Your Backup: A backup is only useful if it can be restored. Before migration day, perform a test restoration on a staging server or a local environment to verify the integrity of the files and database.
- Document Everything: Create a document that details where each backup is stored, the credentials needed to access it, and step-by-step instructions for the restoration process.
- Webflow-Specific Considerations: Webflow Tutorial: Webflow automatically creates backups of your site design. You can access these in Site Settings > Backups. Before making major changes, manually create a new backup and give it a descriptive name like "Pre-Content-Import." While this saves your design, remember it does not back up CMS data from your old platform, which you must export separately (e.g., as a CSV from WordPress).
4. Set Up the New Web Hosting Environment
Before a single file is moved, you must build the robust foundation where your new website will live. Setting up the new web hosting environment is a critical step in any website migration checklist, ensuring the destination infrastructure is not only ready but also optimized for performance, security, and scalability. This stage involves preparing your new server, whether on a platform like Webflow or a dedicated host, to receive your site's data seamlessly.
This process is about creating a stable, high-performing home for your new site. For instance, a fast-growing e-commerce store migrating to Webflow needs to ensure its plan can handle projected traffic spikes during sales events without performance degradation. Similarly, a B2B SaaS company must configure its new environment with security protocols like SSL certificates and firewalls from day one. Neglecting this preparatory work is like building a skyscraper on a weak foundation; it risks performance bottlenecks, security vulnerabilities, and a poor user experience post-launch.
Key Setup Actions
A successful hosting setup goes beyond just purchasing a plan. It requires meticulous configuration to ensure a smooth transition and reliable operation.
- Provision and Configure: Set up your Webflow site plan or provision your new server. Install and configure all necessary software, databases, and programming language versions (e.g., PHP, Node.js) to match your site's requirements. Ensure server resources (CPU, RAM, storage) meet or exceed your current usage and future growth projections.
- Establish a Staging Environment: Webflow Tutorial: Your unpublished Webflow project serves as a staging environment using its
.webflow.iosubdomain. To create a more secure staging site, go to Site Settings > General > Site Password to password-protect it. This allows you to share progress with stakeholders without making the site public. - Security and Monitoring: Implement essential security measures. Install an SSL certificate, configure firewalls, and set up user access controls. Integrate monitoring and logging tools from the start to track performance and errors immediately.
- Technical Readiness: Before executing the technical go-live sequence, ensure thorough preparation by consulting a comprehensive Production Readiness Checklist for Modern Engineering Teams. This helps validate that all dependencies, like SMTP for email delivery, are correctly configured and tested to prevent post-launch surprises.
5. Implement Proper Redirects and DNS Configuration
With your new site built and redirects mapped, the next critical step is flipping the switch. Implementing redirects and updating your Domain Name System (DNS) configuration is the technical core of the migration, responsible for directing all users and search engine crawlers from your old URLs to their new Webflow counterparts. This process ensures a seamless user experience, prevents traffic loss, and signals to search engines that your pages have moved permanently, transferring valuable SEO authority.
This phase is where your meticulous planning pays off. For instance, a major publisher migrating to Webflow must ensure that thousands of article URLs are redirected correctly to avoid a catastrophic drop in organic traffic. Similarly, an e-commerce store needs flawless DNS management to prevent downtime that could cost thousands in lost sales. Getting this step wrong can invalidate all prior efforts, making it an essential part of any comprehensive website migration checklist.
Key Implementation Actions
Proper execution here minimizes downtime and preserves your hard-earned SEO. For Webflow users, this involves both managing your domain settings within the platform and ensuring your redirect map is correctly imported.
- Pre-Launch DNS Preparation: At least 24 to 48 hours before the migration, lower the Time-to-Live (TTL) values on your key DNS records (like the A and CNAME records) to the lowest possible setting, often 300 seconds (5 minutes). This tells servers worldwide to check for updates more frequently, speeding up propagation when you make the final switch.
- Webflow Redirect Implementation: Webflow Tutorial: Navigate to Site Settings > Publishing > 301 Redirects. Upload your completed redirect map CSV. For any complex redirect patterns, you can use wildcards. For example, to redirect all old blog posts from
/blog/old-post-nameto/articles/old-post-name, you can add a single rule: Old Path:/blog/(.*), Redirect to Path:/articles/%1. - DNS Switch & Verification: Webflow Tutorial: In Site Settings > Publishing, add your custom domain. Webflow will provide the specific A records and CNAME record you need to update with your domain registrar (e.g., GoDaddy, Namecheap). Update these records, then click "Check Status" in Webflow until it shows "Connected."
- Post-Launch Monitoring: Once the DNS has propagated, maintain the old hosting and nameservers for at least 48 hours as a fallback. Immediately begin monitoring for 404 errors in Google Search Console and your server logs. Consider setting up a wildcard redirect as a safety net to catch any unmapped URLs and send them to the new homepage.
6. Migrate and Verify All Content and Database
With your staging environment prepared, the next crucial step is the physical transfer of your assets. This involves moving all website content, media files, and database information to the new Webflow site while ensuring perfect data integrity. This process is the digital equivalent of moving the entire contents of your old house into the new one, making sure no family photos or important documents are lost or broken along the way.
This task is central to any website migration checklist because it directly impacts the user experience and site functionality post-launch. For instance, a Webflow site relying on a CMS Collection for blog posts must ensure every field (author, date, rich text content, images) is mapped and imported correctly. Similarly, an e-commerce migration would need to verify that all product details, pricing, and customer data are transferred without corruption. Neglecting thorough validation here can lead to missing content, broken user accounts, and a significant loss of trust.
Key Migration Actions
A successful content and data transfer is methodical and verifiable. For Webflow users, this often involves exporting data from the old CMS into a CSV format and then importing it into the corresponding Webflow CMS Collections.
- Execute the Transfer: Webflow Tutorial: First, create a CMS Collection in Webflow with fields that match your old content (e.g., Post Title, Body, Author, Image). Export your content from the old CMS to a CSV file. In Webflow, go to your new Collection and click "Import." Map the columns from your CSV to the correct Webflow CMS fields.
- Batch and Validate: Migrate content in smaller, manageable batches. For example, import all blog posts first, then case studies. After each batch, perform spot-checks on the live staging site to confirm data integrity, including text formatting, image rendering, and internal link accuracy.
- Verify Data Relationships: Webflow Tutorial: If you have related content (like blog posts and authors), import the "parent" collection first (e.g., Authors). Then, when importing the "child" collection (Posts), you can map the author name column in your CSV to the "Author" reference field in your Webflow Collection.
- Run Content Audits: After the migration, run a fresh crawl of the staging site with a tool like Screaming Frog. Compare the new URL list against your pre-migration inventory to identify any missing pages or assets. Check for new broken links or server errors that arose during the transfer.
7. Test All Website Functionality and Features
A successful migration doesn't end with moving content; it’s validated by a flawless user experience on the new platform. This is where rigorous quality assurance comes in. Conducting comprehensive testing ensures every feature, form, integration, and user pathway on your newly migrated Webflow site works exactly as intended. This crucial step acts as your final defense against launching a site with broken elements that can damage user trust and hurt conversions.
Think of it like a final inspection before opening a new storefront. For instance, an e-commerce brand moving to Webflow must test its entire checkout flow in a staging environment, from adding a product to the cart to processing a test payment and receiving an order confirmation. A B2B SaaS company must verify that its demo request forms not only submit correctly but that the lead data is successfully passed to its CRM. Skipping this part of the website migration checklist is like letting customers into a store where the cash registers don't work; it creates immediate frustration and lost opportunities.
Key Testing Actions
To ensure a smooth launch, your testing protocol must be exhaustive and cover every aspect of the user journey, from browsing to conversion. This includes validating both frontend aesthetics and backend logic.
- Functionality & Forms: Webflow Tutorial: For native Webflow forms, submit test entries and check that they appear in Site Settings > Forms. Ensure email notifications are being sent to the correct address. If you're using a third-party tool like HubSpot, check the integration settings and verify that test submissions appear in your CRM.
- Integrations & Payments: Check all third-party integrations. Ensure your analytics tools (like Google Analytics 4) are receiving data, your marketing automation platform is connected, and any chatbots or scheduling tools are functioning. For e-commerce sites, process test transactions with different payment methods.
- Cross-Browser & Device Testing: Verify that your site displays and functions correctly across all major browsers (Chrome, Firefox, Safari, Edge) and devices. Pay close attention to responsive design, as mobile performance is critical. To ensure your new site is perfectly tuned for all screens, you can learn more about effective mobile website optimization.
- User Path & Error Handling: Webflow Tutorial: To test your 404 page, simply navigate to a URL that doesn't exist on your site (e.g.,
yourdomain.com/test-404). Verify that your custom-designed 404 page appears as expected, rather than a generic server error.
8. Monitor Search Engine Indexing and Rankings
Launching your new website is not the finish line; it’s the start of a critical observation period. Monitoring how search engines like Google discover, index, and rank your migrated content is essential for safeguarding your SEO performance. This step in the website migration checklist involves actively tracking the transition, identifying indexing problems early, and ensuring the hard work you’ve invested translates into maintained or improved search visibility.
Think of this as post-launch quality assurance for your SEO. For instance, a technology company migrating to Webflow would track its core "feature" and "solution" pages to confirm they are indexed and ranking correctly. An e-commerce brand would watch its new category and product URLs to ensure they replace the old ones in search results without losing position. Ignoring this step is like launching a rocket and not checking its trajectory; you risk drifting into SEO oblivion without even knowing it.
Key Monitoring Actions
Vigilant monitoring in the first few weeks is crucial to catch and fix issues before they cause significant damage to your organic traffic and revenue. This is your chance to validate that Google understands and approves of the changes you've made.
- Immediate Sitemap Submission: Webflow Tutorial: As soon as your site is live on the custom domain, go to Site Settings > SEO and ensure "Auto-generate sitemap" is enabled. Your sitemap will be at
yourdomain.com/sitemap.xml. Copy this URL and submit it to Google Search Console under the Sitemaps section. - Indexing & Crawl Status: Use the Coverage report in Search Console to watch how Google indexes your new URLs and de-indexes the old ones. A spike in "Crawled - currently not indexed" or "Not Found (404)" errors requires immediate investigation.
- Ranking & Traffic Analysis: Monitor keyword rankings for your high-value pages daily for the first two weeks using an SEO tool. In Google Analytics, compare organic traffic segments day-over-day and week-over-week against your pre-migration baseline to spot any significant drops.
- URL Inspection: For your most critical pages, use the URL Inspection tool in Search Console. This allows you to request indexing for a specific URL and confirm that Google can render the page correctly, verifying that it is "mobile-friendly" and its structured data is valid.
9. Update Analytics, Tracking, and Monitoring Systems
If your website migration is a success but your analytics are broken, did it even happen? Reconfiguring tracking codes and monitoring systems is a critical step in your website migration checklist, ensuring you maintain a clear, uninterrupted view of your site’s performance. This process ensures data continuity, allowing you to accurately measure the impact of the migration and track user behavior on your new Webflow site.
This step involves methodically replacing old tracking snippets with new ones and verifying that every tool, from Google Analytics to your CRM, is firing correctly. For instance, a SaaS company must ensure its lead form submission goals are triggering properly in Google Analytics 4 (GA4) on the new Webflow site. An e-commerce brand needs to confirm its enhanced e-commerce tracking captures every step of the checkout funnel. Neglecting this is like flying blind; you lose the ability to make data-driven decisions and prove the migration's ROI.
Key Tracking Actions
To ensure seamless data collection, your configuration must be precise and thoroughly tested. This is especially true when moving to a platform like Webflow, where integrations are often managed via custom code embeds or dedicated settings.
- Implement New Tracking Codes: Webflow Tutorial: For Google Analytics, go to Site Settings > Integrations and paste your GA4 Measurement ID into the designated field. For other scripts like Google Tag Manager or Hotjar, go to Site Settings > Custom Code and add the scripts to the "Head Code" or "Footer Code" sections as instructed by the provider.
- Verify Goal & Event Completions: Replicate all your key conversion goals from your old site. Use GTM's Preview mode or GA4's DebugView to test form submissions, button clicks, and other critical user interactions on your staging site before going live.
- Confirm Third-Party Integrations: Check that all marketing and sales tools (e.g., Hotjar, HubSpot, Salesforce) are connected and receiving data from the new site. Verify that heatmap and session recording tools are capturing user activity on the new page layouts.
- Configure Platform-Specific Settings: Webflow Tutorial: If you have custom events you need to track (e.g., modal pop-up views), add a custom attribute to the element in the Webflow Designer (like
data-gtm-event="modal-view"). Then, create a trigger in Google Tag Manager that listens for clicks on elements with that attribute to fire your tracking tag.
10. Establish a Rollback Plan and Communication Strategy
Even the most meticulously planned website migration can encounter unexpected issues. Establishing a robust rollback plan is your ultimate insurance policy, defining the precise steps to revert to your old site if critical failures occur. This isn't about expecting failure; it’s about guaranteeing business continuity. Paired with a clear communication strategy, it ensures all stakeholders, from your internal team to your customers, are kept informed, minimizing panic and confusion.
This process involves creating a step-by-step guide to undo the migration, such as repointing the DNS back to the old server and restoring the original database. For instance, a high-traffic e-commerce site might define a critical failure as the inability to process payments for more than 15 minutes post-launch, triggering an immediate rollback. For a B2B SaaS company, a critical failure might be the lead-capture form on their demo page not functioning. Without this plan, a post-launch issue can turn into a frantic, costly scramble, damaging brand reputation and revenue.
Key Planning Actions
A successful rollback and communication plan requires defining triggers, roles, and messaging in advance. This preparation is a non-negotiable part of a professional website migration checklist.
- Define "Go/No-Go" Criteria: Establish clear, measurable thresholds that define success or failure. These could include server error rates exceeding 5%, a drop in conversion rate by more than 20% in the first hour, or critical user paths being broken.
- Document the Rollback Procedure: Webflow Tutorial: Your primary rollback step is to change your DNS records at your registrar back to the ones for your old hosting provider. Because you lowered the TTL earlier, this change should propagate relatively quickly. Keep your old site's hosting active for at least 72 hours post-launch to make this possible.
- Establish a Command Chain: Clearly define who has the authority to make the rollback decision. This prevents delays and confusion during a high-stress situation. Have key stakeholders (e.g., lead developer, marketing head) on standby during the migration window.
- Prepare Communication Templates: Draft pre-written messages for various scenarios. Create internal updates for your team, a message for the customer support staff, and public-facing notices for your website or social media in case of extended downtime.
10-Step Website Migration Checklist Comparison
| Task | Complexity 🔄 | Resource Requirements ⚡ | Expected Outcomes ⭐ / Impact 📊 | Ideal Use Cases | Key Tips 💡 |
|---|---|---|---|---|---|
| Perform a Comprehensive Website Audit | Medium — systematic, detailed analysis | Medium — SEO/tools + technical reviewer time | High — baseline metrics, fewer surprises, SEO preserved | Any migration, especially large or legacy sites | Use crawlers (Screaming Frog); inventory pages and metrics |
| Create and Test a Complete URL Mapping Strategy | High — many-to-many mappings and edge cases | Medium–High — spreadsheet, redirect tools, QA time | Very High — preserves rankings, reduces 404s and link equity loss | Domain changes, large content restructures | Use 301s, avoid chains, test redirects across devices |
| Back Up All Website Data and Content | Low–Medium — straightforward but thorough | High — storage, encryption, backup tooling | High — rollback capability and data protection | Every migration; sites with critical or regulated data | Keep multiple encrypted copies and test restoration |
| Set Up the New Web Hosting Environment | High — infra provisioning and security setup | High — infra engineers, IaC, monitoring tools | High — improved performance, security, scalability | Platform changes, cloud migrations, scaling efforts | Use IaC (Terraform), staging env, enable monitoring early |
| Implement Proper Redirects and DNS Configuration | Medium–High — timing and propagation concerns | Medium — DNS access, redirect config, monitoring | High — traffic continuity and SEO preservation | DNS/domains changes, phased cutovers | Lower TTL before launch; monitor propagation and MX/DNS |
| Migrate and Verify All Content and Database | Very High — complex data integrity and relations | High — DB tools, engineers, time windows for sync | High — intact data, cleaned/optimized content | Full CMS/DB migrations or legacy system moves | Use native dump/replication, incremental sync, validate samples |
| Test All Website Functionality and Features | Medium — broad QA coverage required | Medium–High — QA engineers, devices, automation | High — reduces post-launch incidents and UX regressions | Any migration with user flows (e-commerce, SaaS) | Test on real devices, validate payments/auth and integrations |
| Monitor Search Engine Indexing and Rankings | Medium — ongoing, time-sensitive monitoring | Low–Medium — Search Console, analytics, rank tools | Medium–High — early SEO issue detection, recovery guidance | SEO-critical sites after migration | Submit sitemap, request indexing, monitor daily first 2 weeks |
UpdateYour Migration is Complete: What's Next?Congratulations, you have successfully navigated the intricate process of a website migration. By meticulously working through this detailed website migration checklist, you have done far more than just launch a new site; you have safeguarded your hard-earned SEO authority, preserved a seamless user experience, and constructed a robust foundation for future digital growth, particularly on a powerful platform like Webflow. But the launch day is not the finish line. It is the starting line for a new era of optimization and expansion. Your new website is now a powerful engine, primed and ready to drive revenue. The real work begins now: leveraging the full capabilities of your new environment to continuously improve, innovate, and outperform the competition. This is where your post-migration strategy transforms from a reactive monitoring phase into a proactive growth initiative. The true value of a successful migration isn't just avoiding a drop in traffic; it's unlocking the potential to accelerate it. From Checklist to Growth Loop: Activating Your New SiteThe completion of your migration checklist marks a pivotal transition. You are moving from a technical, project-based mindset to an ongoing, iterative growth process. Your focus should now shift to leveraging the agility and power of your new platform, especially if you have moved to a system like Webflow, which is built for rapid deployment and optimization. Think of your new site as a living asset. The key takeaways from this journey are not just about the technical steps but about adopting a mindset of continuous improvement.
Embracing the Power of a Modern Web PlatformA successful migration does more than just give your site a facelift. It equips your marketing, sales, and product teams with a superior toolset to achieve their goals. By mastering the concepts in this checklist, you have not only protected your business but also empowered it. The agility to launch new landing pages in hours, not weeks, means your marketing team can be more responsive to market trends. The ability to seamlessly integrate new tools and structured data means you can stay ahead of the curve. This is the strategic advantage you have earned. Your focus now is to build momentum, turning the successful launch into a sustained upward trajectory of traffic, leads, and revenue. For teams ready to transition from post-migration monitoring to aggressive, sustained growth, having a dedicated partner can be a game-changer. At Block Studio, we specialize in transforming ambitious Webflow sites into predictable growth machines by integrating SEO, CRO, design, and development into a single, cohesive strategy. If you're ready to unlock the full potential of your new website and compound your results, explore how we can help you build your future at Block Studio.   |